

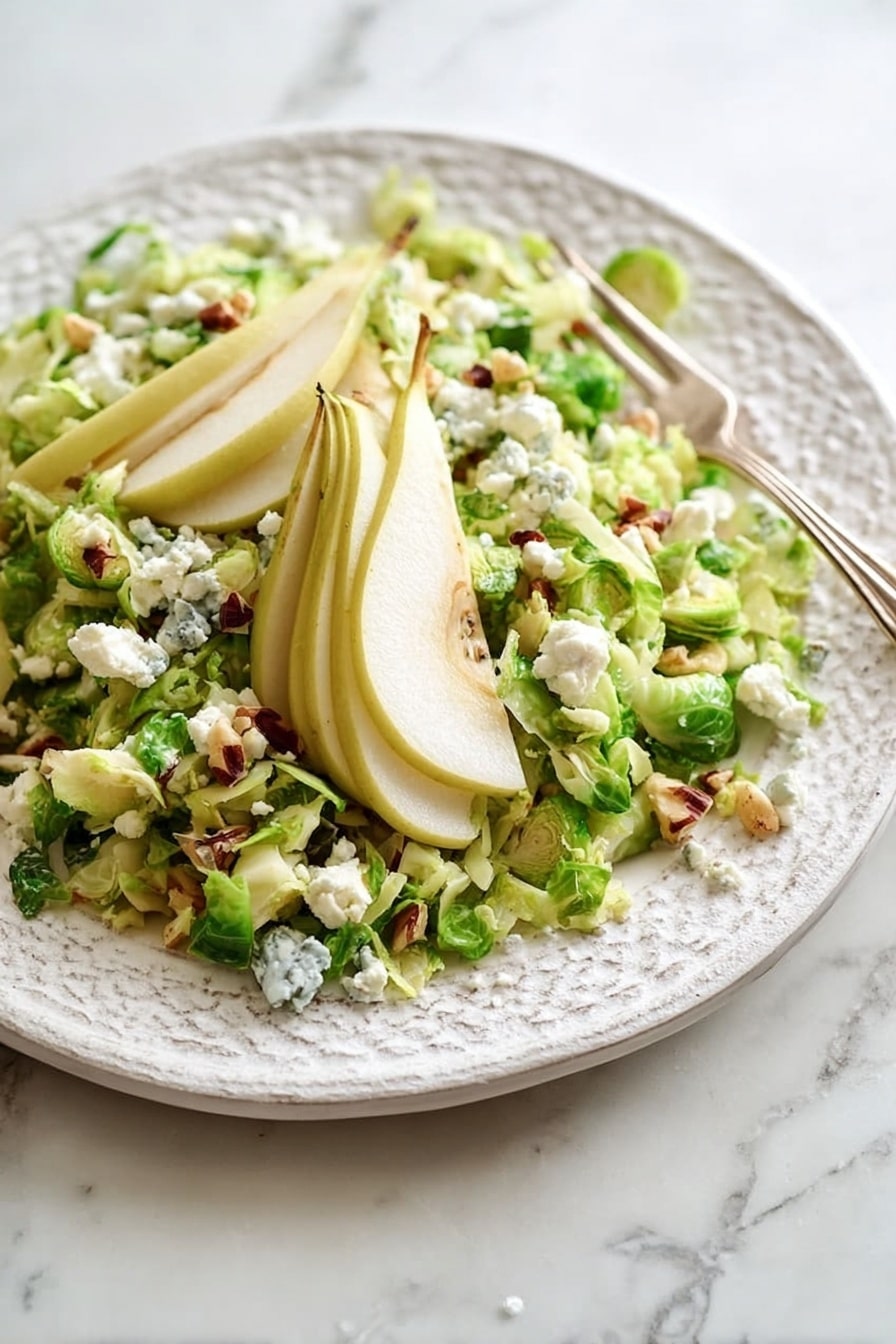
If you’re looking for a salad that feels like a warm hug on a plate, this Maple Bacon Brussels, Pear and Blue Cheese Salad Recipe is exactly what you need. I absolutely love how the crispy, smoky bacon pairs with the tender maple-glazed Brussels sprouts and the sweet, juicy pear slices — it’s a combination that dances on your taste buds. When I first tried this salad, I was amazed at how simple ingredients could come together to create such a perfect balance of savory, sweet, and tangy flavors.
This salad works well as a light lunch, a show-stopping side dish for dinner, or even a unique starter when you’re entertaining. You’ll find that making Maple Bacon Brussels, Pear and Blue Cheese Salad Recipe is not only quick—just about 20 minutes—but also full of comforting textures and tastes that satisfy without feeling heavy. Trust me, once you try it, this recipe will become a go-to for cozy nights or easy entertaining.
Why You’ll Love This Recipe
- Quick and Simple: You’ll have a flavorful and impressive salad ready in just 20 minutes.
- Perfect Flavor Balance: The salty bacon, sweet pears, and pungent blue cheese create a delicious harmony.
- Versatile for Any Meal: Works equally well as a light meal or a side dish for dinner parties.
- Minimal Ingredients: No crazy shopping list—just simple, fresh ingredients you’ll enjoy.
Ingredients You’ll Need
Each ingredient plays a starring role in this Maple Bacon Brussels, Pear and Blue Cheese Salad Recipe. Shopping tip: choose ripe pears that are fragrant but firm, and don’t be shy about picking a good-quality blue cheese—its creaminess really pulls the dish together.
- Thick-cut bacon: Opt for thick-cut for extra crispy texture without drying out.
- Brussels sprouts: Use fresh sprouts; removing the stems and slicing helps them cook evenly and absorb the maple syrup better.
- Maple syrup: Choose pure maple syrup for the best natural sweetness—it caramelizes nicely with the sprouts.
- Black pepper: Freshly ground if possible, for more aromatic seasoning.
- Salt: Just a pinch to bring all the flavors together but not overpower.
- Ripe pear: Bartlett or Bosc pears work beautifully, sliced thin for easy layering.
- Blue cheese: Crumbled, and I love adding it in two stages for that creamy surprise in every bite.
Note: Exact ingredients and measurements are listed in the recipe card below.
Variations
I like to keep things classic but there’s so much room to play with the Maple Bacon Brussels, Pear and Blue Cheese Salad Recipe. Feel free to tweak it to your preference or to what you have on hand — this salad is forgiving and inviting.
- Swap the Cheese: I sometimes use goat cheese or feta if blue cheese feels too bold; it still adds that lovely creaminess but with a milder tang.
- Make it Vegan: I’ve tried this with smoked tempeh instead of bacon and a nut-based “blue cheese” alternative—it’s delicious and satisfying.
- Add Nuts: Toasted walnuts or pecans add a crunchy layer I adore—my family goes crazy for this twist.
- Seasonal Adjustments: In winter, I sometimes roast the Brussels for extra depth of flavor before tossing with the syrup and bacon.
How to Make Maple Bacon Brussels, Pear and Blue Cheese Salad Recipe
Step 1: Render That Bacon to Crispy Perfection
Heat a large skillet over medium-low heat and add the chopped thick-cut bacon. Stir occasionally so it cooks evenly, and wait for the fat to render out — this is what will give your Brussels sprouts that incredible flavor. I learned early on not to crank up the heat; slow and steady cooking prevents burnt bits and gets you perfectly crispy bacon in about 5 to 6 minutes. Use a slotted spoon to remove the bacon and drain it on paper towels, reserving the bacon grease for the next step.
Step 2: Maple-Glazed Brussels Sprouts Magic
Add the sliced Brussels sprouts to that glorious bacon fat in the skillet and toss them to coat. Let them soften over medium heat for about 5 minutes — you want them tender but still with a bit of bite. Then drizzle in the maple syrup, stirring constantly for 1-2 more minutes so the sprouts get a beautiful caramelized glaze. Season with salt and freshly ground black pepper. This step is the heart of the Maple Bacon Brussels, Pear and Blue Cheese Salad Recipe, where the savory and sweet marry seamlessly.
Step 3: Bring It All Together
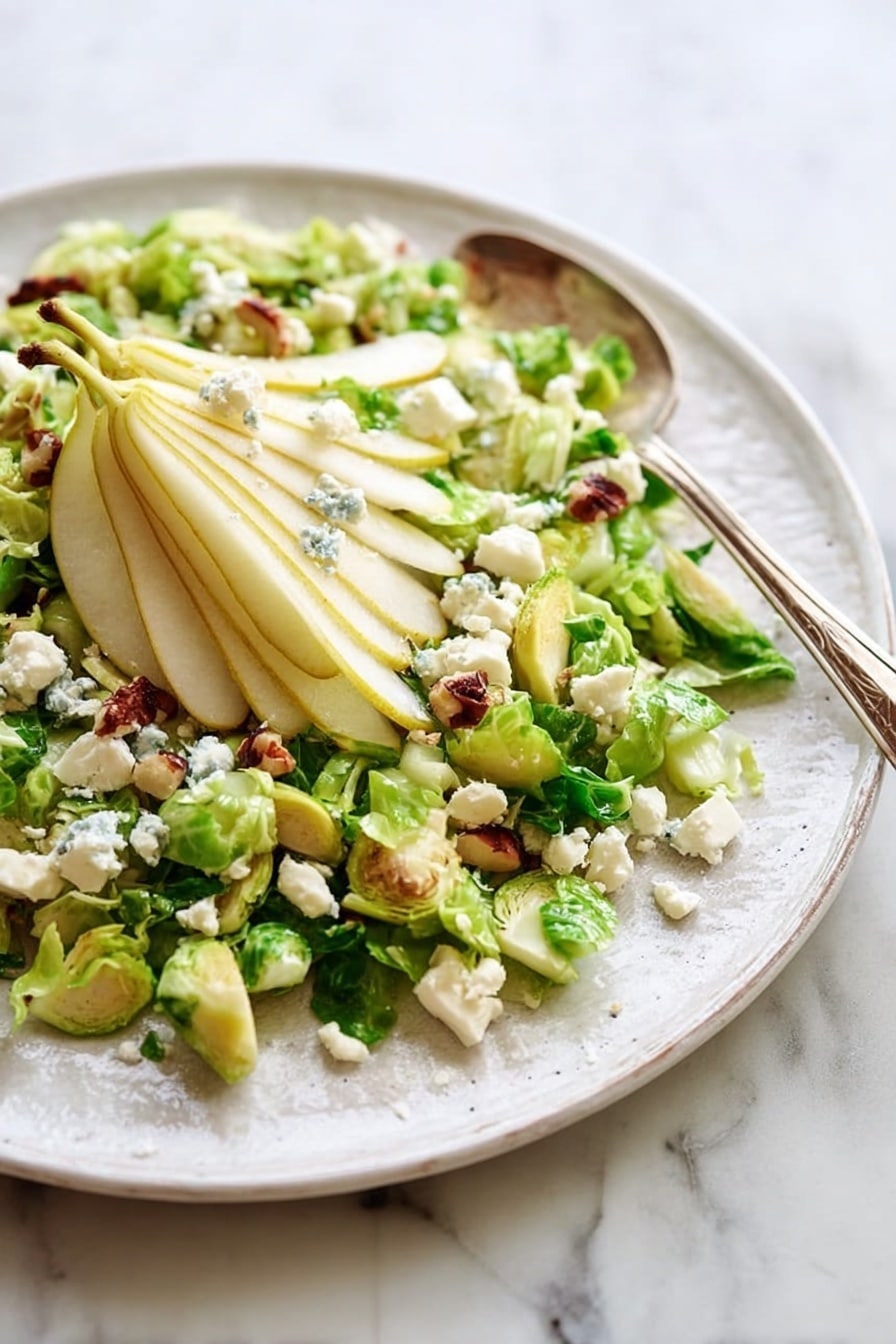
Return the crispy bacon to the skillet and scatter in half of your crumbled blue cheese. Stir gently until everything is combined and the cheese starts to melt just a bit. Transfer the Brussels mixture to a serving bowl or plate and artistically arrange your thin pear slices over the top. For a final touch, crumble the remaining blue cheese on top and add a sprinkle of black pepper if you like that little extra kick. Voilà — your Maple Bacon Brussels, Pear and Blue Cheese Salad Recipe is ready to enjoy!
Pro Tips for Making Maple Bacon Brussels, Pear and Blue Cheese Salad Recipe
- Render Bacon Slowly: Cooking bacon over medium-low heat ensures maximum crispiness and flavorful fat without burning.
- Don’t Overcook Brussels: Stop cooking when sprouts are tender with a slight bite to avoid mushiness.
- Add Cheese in Two Stages: Incorporate some blue cheese in the pan for melty richness and crumble the rest fresh on top for bursts of flavor and texture.
- Choose Ripe Pears: Use pears that are ripe but firm to keep them from turning mushy when served.
How to Serve Maple Bacon Brussels, Pear and Blue Cheese Salad Recipe
Garnishes
I usually keep the garnish simple — a sprinkle of freshly cracked black pepper and a few leftover crumbles of blue cheese scattered on top. Sometimes, I add chopped toasted walnuts or a few fresh thyme leaves to elevate the salad’s presentation and add a bit of crunch and aroma. These little touches really help the salad shine visually and in flavor.
Side Dishes
This salad pairs beautifully with roasted chicken or grilled pork chops — something straightforward that complements rather than competes with the bold bacon and blue cheese. On busy weeknights, I’ll serve it alongside some warm crusty bread and soup for an easy, balanced meal everyone loves.
Creative Ways to Present
For a special occasion, I like to serve this salad in individual small bowls or on wooden boards alongside rustic bread and a selection of cheeses and cured meats. Layering the pear slices artfully with scattered blue cheese crumbles gives it a restaurant-worthy look that always impresses guests.
Make Ahead and Storage
Storing Leftovers
I usually store leftovers in an airtight container in the fridge and try to eat them within 2 days. The Brussels and bacon taste just as good cold or at room temperature, but the pear slices might soften a little — if you want to keep them crisp, I’d recommend adding fresh pear right before serving.
Freezing
Since this salad contains fresh fruit and cheese, freezing isn’t ideal. However, you could freeze the cooked Brussels and bacon mixture separately without the pears and blue cheese, then combine everything fresh when ready to eat. This works well if you want to prep part of the recipe ahead of time.
Reheating
If you have leftover Brussels and bacon, I gently reheat them in a skillet over medium heat to keep them crisp without overcooking. Then add fresh pears and blue cheese on serving to maintain freshness and texture.
FAQs
-
Can I use frozen Brussels sprouts for this salad?
Fresh Brussels sprouts work best here because they keep a nice texture after cooking. Frozen sprouts tend to release too much water and can become mushy when sautéed, which would affect the salad’s overall quality.
-
What type of pears do you recommend for this salad?
I love using Bartlett or Bosc pears because they’re sweet and hold their shape well when sliced thin. Make sure they’re ripe but not overripe, so you get that perfect bite and sweetness.
-
Can I make this salad vegan or vegetarian?
Absolutely! For a vegetarian version, you can omit the bacon or replace it with smoked mushrooms or tempeh. Vegan blue cheese alternatives and maple syrup keep the flavor profile rich and satisfying.
-
How do I store leftovers to keep the salad fresh?
Store leftover Brussels and bacon mixture separately from fresh pear slices and blue cheese to keep everything tasting fresh. Add the pear and cheese just before serving, and keep everything refrigerated in airtight containers for up to 2 days.
Final Thoughts
This Maple Bacon Brussels, Pear and Blue Cheese Salad Recipe has earned a permanent spot in my kitchen rotation because it’s just that good—comforting yet fresh, simple yet vibrant. I encourage you to try it out and see how a handful of easy ingredients can transform into something truly special. Whether it’s a weeknight dinner or a gathering with friends, this salad brings an inviting mix of flavors and textures that’s sure to make your meal feel memorable. Give it a go—you’ll love the delicious harmony as much as I do!
PrintMaple Bacon Brussels, Pear and Blue Cheese Salad Recipe
This Maple Bacon Brussels, Pear and Blue Cheese Salad combines crispy bacon, tender maple-glazed Brussels sprouts, sweet pear slices, and tangy blue cheese for a flavorful and satisfying dish. Perfect as a hearty side or light meal, it balances savory, sweet, and sharp flavors in a simple skillet-prepared recipe.
- Prep Time: 5 minutes
- Cook Time: 15 minutes
- Total Time: 20 minutes
- Yield: 2 to 4 servings
- Category: Salad
- Method: Frying
- Cuisine: American
Ingredients
Bacon and Brussels Sprouts
- 4 slices thick-cut bacon, chopped
- 1 pound Brussels sprouts stems removed and sliced
- 2 tablespoons maple syrup
- 1/4 teaspoon black pepper
- 1/8 teaspoon salt
Salad Components
- 1 large ripe pear, thinly sliced
- 4 ounces blue cheese, crumbled
Instructions
- Cook the Bacon: Heat a large skillet over medium-low heat. Add the chopped bacon and cook, stirring occasionally, until the fat is rendered and the bacon becomes crispy, about 5 to 6 minutes. Use a slotted spoon to remove the bacon from the skillet and place it on paper towels to drain excess grease.
- Prepare the Brussels Sprouts: In the bacon grease still in the skillet, add the sliced Brussels sprouts. Stir well to coat them in the fat. Cook over medium-low heat until the sprouts start to soften, approximately 5 minutes.
- Glaze with Maple Syrup: Stir in 2 tablespoons of maple syrup with the Brussels sprouts and continue cooking 1 to 2 minutes, stirring frequently to glaze the sprouts evenly. Season with 1/8 teaspoon salt and 1/4 teaspoon black pepper.
- Combine Bacon and Cheese: Return the crispy bacon to the skillet with the Brussels sprouts and add half of the crumbled blue cheese. Gently stir to incorporate the cheese and bacon throughout the sprouts.
- Assemble the Salad: Transfer the Brussels sprout mixture to a plate or bowl. Arrange thin slices of pear on top, sprinkle with additional black pepper if desired, and crumble the remaining blue cheese over the salad for a final touch.
Notes
- Use ripe pears for the best balance of sweetness and texture.
- If you prefer less salt, omit or reduce the salt as bacon and blue cheese are naturally salty.
- This salad is best served warm or at room temperature.
- For a nuttier twist, add toasted pecans or walnuts.
- Maple syrup can be substituted with honey if preferred.


