- White chocolate chips: I recommend good quality chips that melt smoothly, ensuring a creamy coating for the Oreos.
- Coconut oil: This helps thin the chocolate so it coats the Oreos beautifully without being too thick or cakey.
- Lollipop sticks: Essential for turning the Oreos into festive pops that are easy to hold and eat.
- Halloween Oreos: Seasonal Oreos work great here for flavor and fun—plain Oreos also work if you can’t find themed ones.
- Black icing: You’ll use this for drawing Jack’s iconic spooky face, so look for a tube or tub with a fine tip for precision.
- Black ribbons: These add the final decorative flair, tying everything together with that signature look.
Note: Exact ingredients and measurements are listed in the recipe card below.
Variations
This Jack Skellington Oreo Pops Recipe is super flexible, and I’ve found that playing around with decorations or chocolate types makes it even more fun. Feel free to tailor it however you like!
- Chocolate Choice: For a twist, try dipping Oreos in dark or milk chocolate instead of white, then use contrasting icing for Jack’s face. It adds a richer flavor that some guests prefer.
- Dietary Mods: You can use vegan white chocolate chips and dairy-free Oreos if you want to keep this recipe plant-based and allergy-friendly.
- Seasonal Adaptations: Swap the Halloween Oreos with other holiday-themed cookies and decorate accordingly—who says Jack can’t visit Christmas?
- Extra Decorations: Add edible glitter or tiny sprinkles around the edges before the chocolate sets for a little extra sparkle and fun texture.
How to Make Jack Skellington Oreo Pops Recipe
Step 1: Melt the Chocolate Smoothly
Start by placing your white chocolate chips and coconut oil in a medium heatproof bowl. Microwave them in short 20-second bursts, stirring well each time. This method helps prevent the chocolate from burning and keeps it silky smooth. You’ll know it’s ready when it’s completely melted and glossy, which usually takes about a minute total. I always give it a good stir after the last burst to keep everything evenly melted.
Step 2: Prepare the Oreos on Sticks
Now comes the fun part—carefully push a lollipop stick into the cream center of each Oreo. Go slow so the cookie doesn’t crack or break apart. If your Oreos feel a bit fragile, you can twist off the top cookie gently, place the stick in the cream, then sandwich the cookie back on top. This tip helped me save a few pops early on when I rushed the process!
Step 3: Dip and Chill the Oreo Pops
Hold each Oreo pop over the melted chocolate and spoon the coating over both sides until fully covered. Let the excess drip back into the bowl so you get a nice, even coat without too much chocolate pooling around the base. Place each one on a parchment-lined tray—that keeps them from sticking and makes cleanup a breeze. Pop the tray into the fridge for 5 to 10 minutes until the chocolate hardens. This step is crucial so your pops hold their shape when decorated.
Step 4: Decorate Jack’s Face and Finish
Use black icing and a toothpick to carefully draw Jack Skellington’s iconic face onto each white chocolate-coated Oreo. Take your time with this—there’s something super satisfying about seeing Jack’s grin come to life. Once the icing sets slightly, tie a black ribbon bow around the bottom of each lollipop stick. This little touch instantly transforms these pops from cute to spooky chic!
Pro Tips for Making Jack Skellington Oreo Pops Recipe
- Use Room-Temperature Ingredients: Let your white chocolate chips sit out a bit before melting to avoid clumping or seizing.
- Be Gentle with Sticks: I learned that slowly inserting sticks keeps the Oreos intact and looking neat on the finished pop.
- Decorate While Chilled: I find the black icing applies more smoothly when the white chocolate is chilled but not icy cold.
- Prevent Breaking: Don’t handle the pops too much until the coating hardens—that was a mistake I made once and ended up with a chocolate mess!
How to Serve Jack Skellington Oreo Pops Recipe
Garnishes
I usually keep garnishes simple here—after all, Jack’s face is the star! But sometimes, I like to add a sprinkle of edible black glitter or tiny silver stars around the edges. It adds a little extra sparkle without overwhelming the spooky vibe. The black ribbon bows tie everything together perfectly and make these ready for display.
Side Dishes
If you’re serving these at a party, I love pairing the Oreo pops with a big bowl of marshmallow treats or ghost-shaped cupcakes. The contrasting textures and flavors keep the dessert table interesting and delight kids and adults alike.
Creative Ways to Present
One of my favorite presentation ideas is to stick the Oreo pops upright in a pumpkin or a foam block covered with black tissue paper. Adding some faux spider webs and mini plastic spiders around the base really amps up the Halloween vibe. You can also arrange them in a decorated vase or jar tied with more black ribbon for a super cute Halloween centerpiece.
Make Ahead and Storage
Storing Leftovers
Once made, I store my Jack Skellington Oreo Pops Recipe in an airtight container in the fridge. They keep well for up to a week, which is great if you’re prepping for a party a few days ahead. Just make sure the pops aren’t touching to avoid smudging the decorations.
Freezing
Freezing these pops is doable but I wouldn’t recommend it for long-term storage because the chocolate sometimes blooms or cracks when thawed. If you do freeze them, wrap each pop individually in plastic wrap and place in a sealed container. Thaw in the fridge before serving to keep the design intact.
Reheating
Since these treats are best served chilled and don’t really need reheating, I usually just let them come to room temperature for a few minutes before serving if they’ve been refrigerated. This lets the chocolate soften slightly without melting or losing Jack’s detailed face.
FAQs
-
Can I use regular Oreos instead of Halloween Oreos?
Absolutely! Regular Oreos work perfectly fine for this recipe. The Halloween Oreos just add an extra festive touch, but the white chocolate coating and Jack Skellington decorations will transform any Oreo into a spooky treat.
-
What’s the best way to melt white chocolate without it seizing?
Melting white chocolate slowly in short bursts in the microwave while stirring between each is key. Adding a bit of coconut oil thins the chocolate and makes it less likely to seize. Avoid overheating by sticking to 20-second increments and stirring frequently.
-
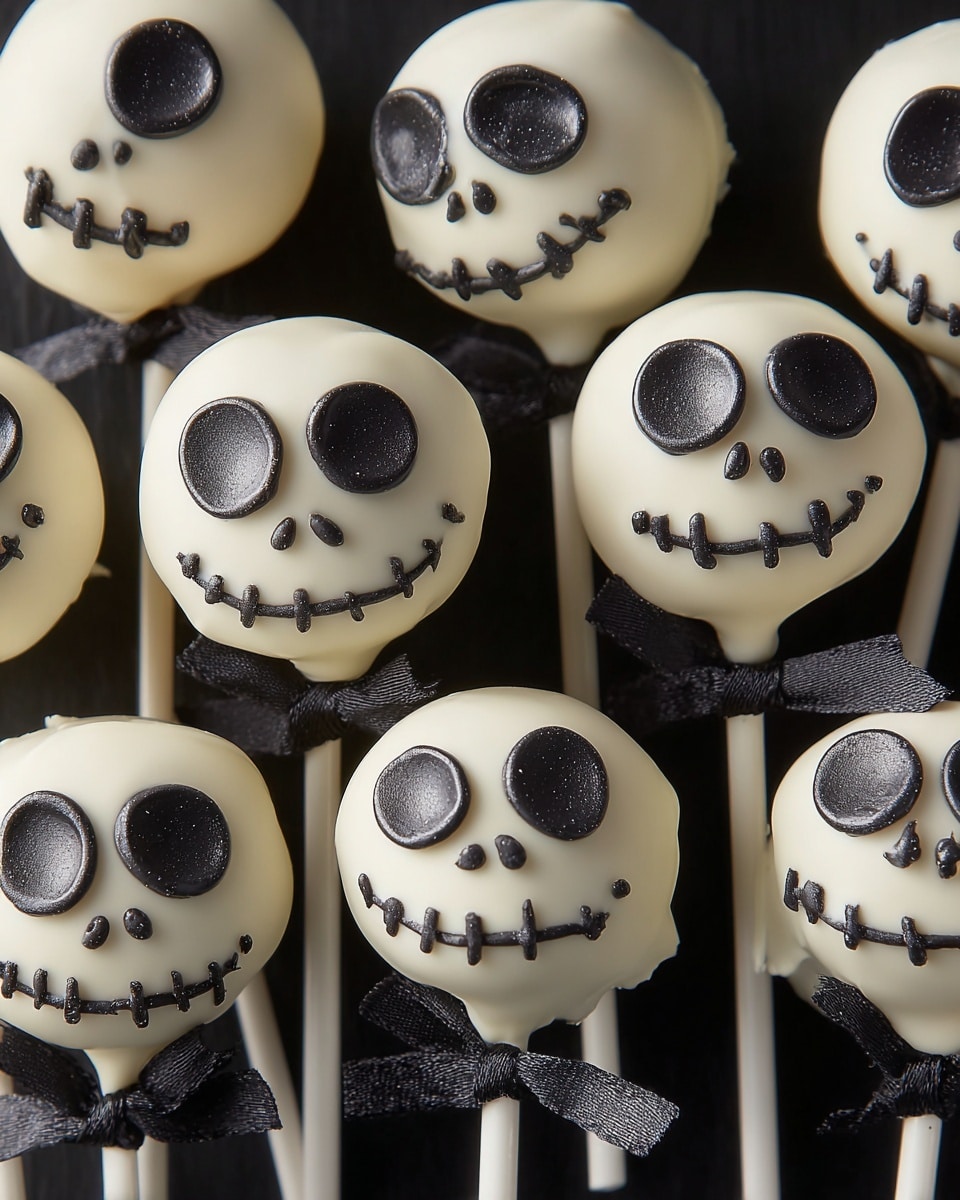
How do I draw Jack Skellington’s face neatly?
Using black icing with a fine tip or piping bag and a toothpick helps you get precise lines. I like to practice on parchment paper first to get the design down, then carefully recreate it on the Oreo pops. Patience is key, especially with the grin!
-
Can I make these Jack Skellington Oreo Pops ahead of time?
Yes, you can make them a day or two in advance. Just store them in a single layer in an airtight container in the fridge to keep the decorations fresh and the chocolate coating firm.
Final Thoughts
This Jack Skellington Oreo Pops Recipe holds a special place in my heart because it’s the ultimate blend of easy, fun, and delicious. Making these has become a seasonal tradition in my home—it’s where creativity meets comfort food with a little spooky spirit. I can’t wait for you to try it out and see the smiles it brings to your table. Honestly, once you make one batch, I’m betting you’ll be hooked and ready to make these every Halloween!
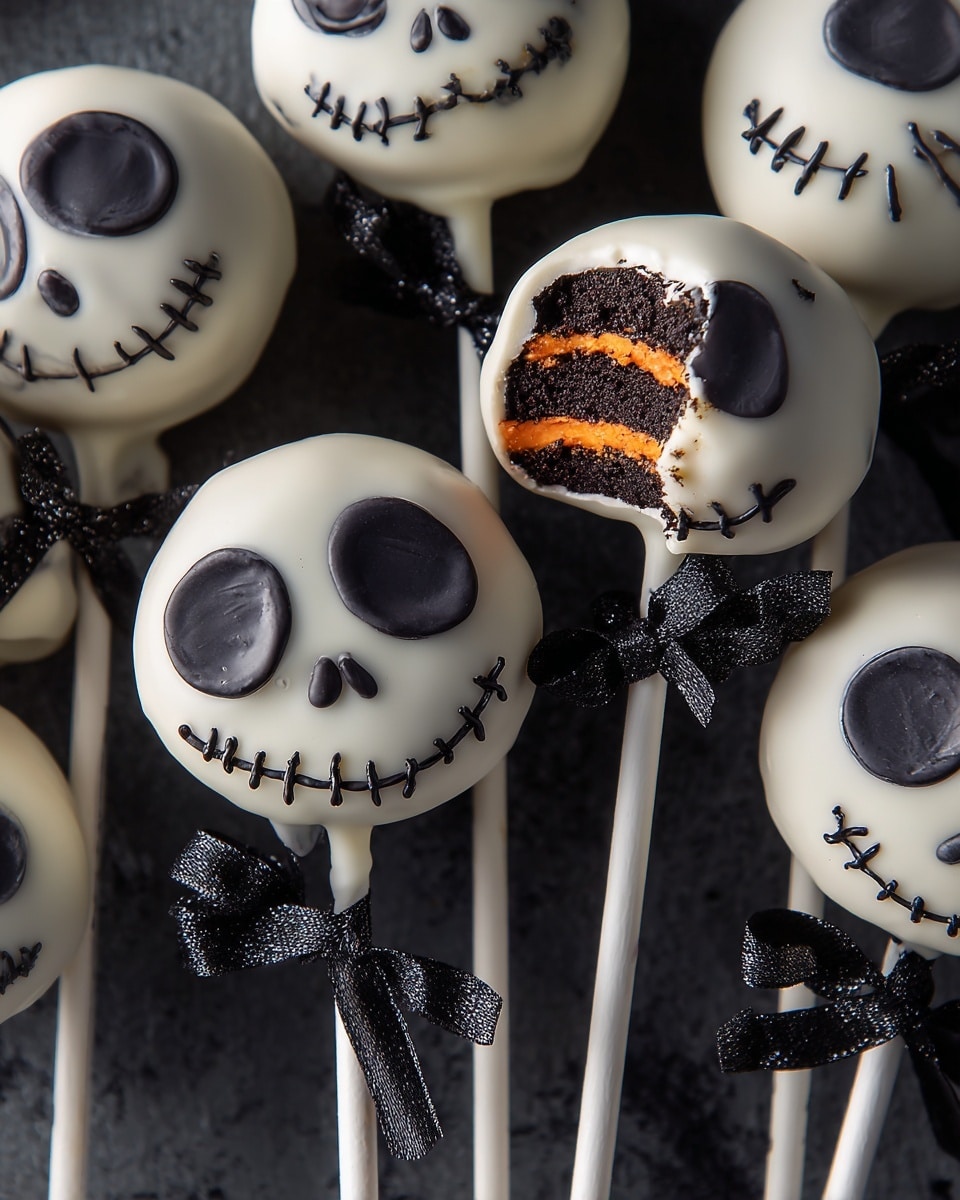
If you’ve been hunting for a sweet treat that’s as fun to make as it is to eat, this Jack Skellington Oreo Pops Recipe is an absolute gem. I stumbled upon this idea when I wanted a spooky-yet-easy dessert for Halloween, and trust me, these pops take Oreo cookies to a whole new level of festive delight. They’re perfect for parties, school events, or just some cozy kitchen crafting with the kids.
What I love most about this Jack Skellington Oreo Pops Recipe is how it transforms simple ingredients into something magical. The crisp white chocolate coating is the perfect canvas for Jack’s iconic spooky face, and the black ribbons add that charming finishing touch. Plus, they’re quick to make, so you don’t have to wait forever for your spooky snack fix!
Why You’ll Love This Recipe
- Easy and Quick: You can whip these up in about 25 minutes, making them ideal for last-minute parties or Halloween treats.
- Crowd-Pleaser: My family goes crazy for these pops—they’re a hit with both kids and adults alike.
- Creative Fun: Decorating Jack’s face is seriously therapeutic, and you can personalize each pop to your liking.
- Perfect Presentation: The black ribbons add a cute, festive touch that elevates these simple treats into memorable delights.
Ingredients You’ll Need
I love how straightforward this Jack Skellington Oreo Pops Recipe is when it comes to ingredients. You only need a handful of pantry staples and some fun Halloween Oreos to get started. Here’s a quick look at what you’ll want to have on hand before diving in.
- White chocolate chips: I recommend good quality chips that melt smoothly, ensuring a creamy coating for the Oreos.
- Coconut oil: This helps thin the chocolate so it coats the Oreos beautifully without being too thick or cakey.
- Lollipop sticks: Essential for turning the Oreos into festive pops that are easy to hold and eat.
- Halloween Oreos: Seasonal Oreos work great here for flavor and fun—plain Oreos also work if you can’t find themed ones.
- Black icing: You’ll use this for drawing Jack’s iconic spooky face, so look for a tube or tub with a fine tip for precision.
- Black ribbons: These add the final decorative flair, tying everything together with that signature look.
Note: Exact ingredients and measurements are listed in the recipe card below.
Variations
This Jack Skellington Oreo Pops Recipe is super flexible, and I’ve found that playing around with decorations or chocolate types makes it even more fun. Feel free to tailor it however you like!
- Chocolate Choice: For a twist, try dipping Oreos in dark or milk chocolate instead of white, then use contrasting icing for Jack’s face. It adds a richer flavor that some guests prefer.
- Dietary Mods: You can use vegan white chocolate chips and dairy-free Oreos if you want to keep this recipe plant-based and allergy-friendly.
- Seasonal Adaptations: Swap the Halloween Oreos with other holiday-themed cookies and decorate accordingly—who says Jack can’t visit Christmas?
- Extra Decorations: Add edible glitter or tiny sprinkles around the edges before the chocolate sets for a little extra sparkle and fun texture.
How to Make Jack Skellington Oreo Pops Recipe
Step 1: Melt the Chocolate Smoothly
Start by placing your white chocolate chips and coconut oil in a medium heatproof bowl. Microwave them in short 20-second bursts, stirring well each time. This method helps prevent the chocolate from burning and keeps it silky smooth. You’ll know it’s ready when it’s completely melted and glossy, which usually takes about a minute total. I always give it a good stir after the last burst to keep everything evenly melted.
Step 2: Prepare the Oreos on Sticks
Now comes the fun part—carefully push a lollipop stick into the cream center of each Oreo. Go slow so the cookie doesn’t crack or break apart. If your Oreos feel a bit fragile, you can twist off the top cookie gently, place the stick in the cream, then sandwich the cookie back on top. This tip helped me save a few pops early on when I rushed the process!
Step 3: Dip and Chill the Oreo Pops
Hold each Oreo pop over the melted chocolate and spoon the coating over both sides until fully covered. Let the excess drip back into the bowl so you get a nice, even coat without too much chocolate pooling around the base. Place each one on a parchment-lined tray—that keeps them from sticking and makes cleanup a breeze. Pop the tray into the fridge for 5 to 10 minutes until the chocolate hardens. This step is crucial so your pops hold their shape when decorated.
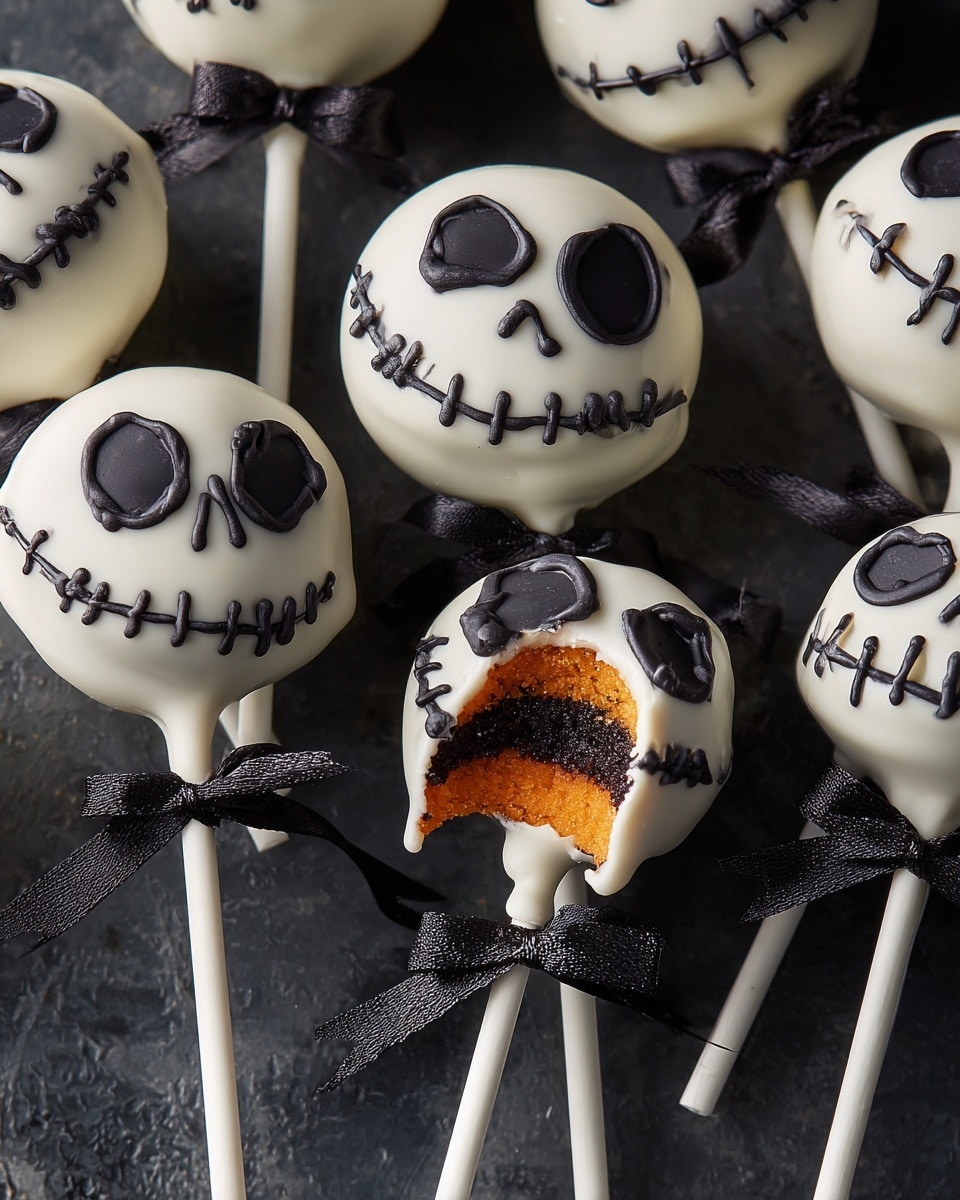
Step 4: Decorate Jack’s Face and Finish
Use black icing and a toothpick to carefully draw Jack Skellington’s iconic face onto each white chocolate-coated Oreo. Take your time with this—there’s something super satisfying about seeing Jack’s grin come to life. Once the icing sets slightly, tie a black ribbon bow around the bottom of each lollipop stick. This little touch instantly transforms these pops from cute to spooky chic!
Pro Tips for Making Jack Skellington Oreo Pops Recipe
- Use Room-Temperature Ingredients: Let your white chocolate chips sit out a bit before melting to avoid clumping or seizing.
- Be Gentle with Sticks: I learned that slowly inserting sticks keeps the Oreos intact and looking neat on the finished pop.
- Decorate While Chilled: I find the black icing applies more smoothly when the white chocolate is chilled but not icy cold.
- Prevent Breaking: Don’t handle the pops too much until the coating hardens—that was a mistake I made once and ended up with a chocolate mess!
How to Serve Jack Skellington Oreo Pops Recipe
Garnishes
I usually keep garnishes simple here—after all, Jack’s face is the star! But sometimes, I like to add a sprinkle of edible black glitter or tiny silver stars around the edges. It adds a little extra sparkle without overwhelming the spooky vibe. The black ribbon bows tie everything together perfectly and make these ready for display.
Side Dishes
If you’re serving these at a party, I love pairing the Oreo pops with a big bowl of marshmallow treats or ghost-shaped cupcakes. The contrasting textures and flavors keep the dessert table interesting and delight kids and adults alike.
Creative Ways to Present
One of my favorite presentation ideas is to stick the Oreo pops upright in a pumpkin or a foam block covered with black tissue paper. Adding some faux spider webs and mini plastic spiders around the base really amps up the Halloween vibe. You can also arrange them in a decorated vase or jar tied with more black ribbon for a super cute Halloween centerpiece.
Make Ahead and Storage
Storing Leftovers
Once made, I store my Jack Skellington Oreo Pops Recipe in an airtight container in the fridge. They keep well for up to a week, which is great if you’re prepping for a party a few days ahead. Just make sure the pops aren’t touching to avoid smudging the decorations.
Freezing
Freezing these pops is doable but I wouldn’t recommend it for long-term storage because the chocolate sometimes blooms or cracks when thawed. If you do freeze them, wrap each pop individually in plastic wrap and place in a sealed container. Thaw in the fridge before serving to keep the design intact.
Reheating
Since these treats are best served chilled and don’t really need reheating, I usually just let them come to room temperature for a few minutes before serving if they’ve been refrigerated. This lets the chocolate soften slightly without melting or losing Jack’s detailed face.
FAQs
-
Can I use regular Oreos instead of Halloween Oreos?
Absolutely! Regular Oreos work perfectly fine for this recipe. The Halloween Oreos just add an extra festive touch, but the white chocolate coating and Jack Skellington decorations will transform any Oreo into a spooky treat.
-
What’s the best way to melt white chocolate without it seizing?
Melting white chocolate slowly in short bursts in the microwave while stirring between each is key. Adding a bit of coconut oil thins the chocolate and makes it less likely to seize. Avoid overheating by sticking to 20-second increments and stirring frequently.
-
How do I draw Jack Skellington’s face neatly?
Using black icing with a fine tip or piping bag and a toothpick helps you get precise lines. I like to practice on parchment paper first to get the design down, then carefully recreate it on the Oreo pops. Patience is key, especially with the grin!
-
Can I make these Jack Skellington Oreo Pops ahead of time?
Yes, you can make them a day or two in advance. Just store them in a single layer in an airtight container in the fridge to keep the decorations fresh and the chocolate coating firm.
Final Thoughts
This Jack Skellington Oreo Pops Recipe holds a special place in my heart because it’s the ultimate blend of easy, fun, and delicious. Making these has become a seasonal tradition in my home—it’s where creativity meets comfort food with a little spooky spirit. I can’t wait for you to try it out and see the smiles it brings to your table. Honestly, once you make one batch, I’m betting you’ll be hooked and ready to make these every Halloween!