
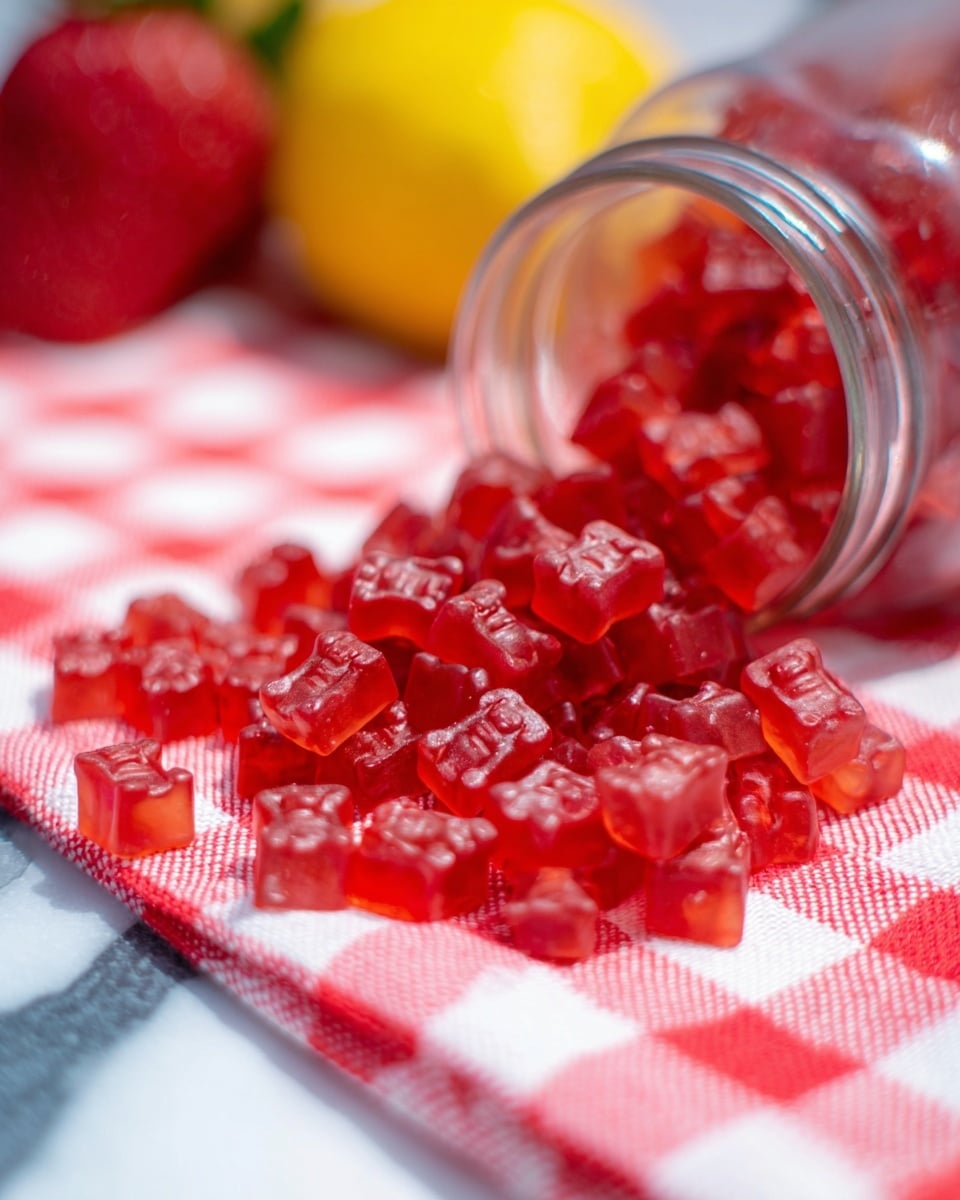
Get ready to fall in love with these delightful, chewy treats that burst with real fruit flavor! This Homemade Strawberry Gummies Recipe is the perfect way to enjoy a sweet, natural snack made right in your kitchen — no artificial flavors or preservatives, just pure strawberry happiness packed into every bite!
Why You’ll Love This Recipe
- All-Natural Ingredients: No synthetic colors or flavors means these gummies are a healthier treat option.
- Unbelievably Easy to Make: Just a few simple steps and minimal kitchen tools are needed to create these gems.
- Customizable Flavors: Swap strawberries for any fruit you love to keep snack time exciting.
- Perfect for Kids and Adults: Fun shapes and vibrant color make these gummies a hit for everyone.
Ingredients You’ll Need
This recipe calls for just a handful of ingredients, each crucial for creating those perfectly chewy, flavorful strawberry gummies. From fresh fruit for natural sweetness to gelatin for that iconic gummy texture, these components come together beautifully.
- Fresh Strawberries: Use ripe, juicy strawberries for vibrant color and authentic strawberry flavor.
- Unflavored Gelatin: This is the magic behind the gummies’ chewy texture — make sure to use unflavored for best results.
- Raw Honey: A natural sweetener that adds a subtle depth without overpowering the fruit taste.
- Fresh Lemon Juice: Adds brightness and balances the sweetness perfectly.
- Gummy Bear Molds: Fun shapes make the gummies extra special and easy to pop out.
Note: Exact ingredients and measurements are listed in the recipe card below.
Variations
One of the things I absolutely adore about this Homemade Strawberry Gummies Recipe is how easy it is to customize. Feel free to mix and match ingredients to suit your taste, dietary preferences, or ingredient availability!
- Different Fruits: Try raspberries, mango, or blueberries instead of strawberries for exciting new flavors.
- Alternative Sweeteners: Swap honey for maple syrup or agave nectar to make it vegan-friendly.
- Add Herbs or Spices: Infuse your gummies with mint, basil, or a pinch of cinnamon to give them a unique twist.
- Sugar-Free Version: Use a gelatin alternative like agar-agar and naturally sweetened fruit purée for a low-sugar option.
How to Make Homemade Strawberry Gummies Recipe
Step 1: Blend the Strawberries
Start by placing your diced strawberries, lemon juice, and raw honey in a blender. Blend everything together until you get a smooth, vibrant strawberry juice. If your strawberries are really seedy, don’t hesitate to strain the mixture through a fine mesh to keep your gummies silky smooth.
Step 2: Heat and Activate the Gelatin
Pour your strawberry juice into a saucepan over medium heat and sprinkle in the unflavored gelatin. Stir gently and keep whisking as the mixture warms up—this helps dissolve the gelatin completely. Bring it to a slow boil, then immediately remove from heat once bubbling.
Step 3: Fill the Molds
Using the handy eyedropper that comes with the gummy bear molds, or a food-safe squeeze bottle, carefully fill each mold with the strawberry gelatin mixture. Take your time here for neat, full gummies that look as good as they taste.
Step 4: Chill Until Set
Pop your filled molds into the fridge for about 20 minutes to let the gummies firm up. Keep the leftover mixture warm on a low heat or by placing the squeeze bottle in hot water to prevent it from setting prematurely while you fill all molds.
Step 5: Enjoy Your Gummies!
Once your strawberry gummies are set and firm, gently pop them out of the molds and get ready to enjoy. These chewy, fruity treats are perfect for snacking anytime you want a natural burst of sweetness!
Pro Tips for Making Homemade Strawberry Gummies Recipe
- Use Fresh Strawberries: Fresh berries give the best flavor and vibrant color; frozen can work but might water down the taste.
- Don’t Overheat the Gelatin: Boiling too long can affect the texture, so once it bubbles, take it off the heat promptly.
- Fill Molds Slowly: Patience here prevents spills and creates perfect-shaped gummies every time.
- Keep the Mixture Warm While Filling: This stops premature setting and makes mold filling a breeze.
How to Serve Homemade Strawberry Gummies Recipe

Garnishes
Sprinkle your homemade strawberry gummies lightly with a touch of powdered sugar or roll them in a bit of cornstarch to prevent sticking if you’re making larger batches. For a little extra flair, place edible flower petals or tiny mint leaves alongside your serving platter to brighten presentation.
Side Dishes
These gummies shine on their own but can be happily paired with other light snacks like fresh fruit slices, yogurt parfaits, or a refreshing cucumber salad to create a balanced snack spread perfect for kids and grown-ups alike.
Creative Ways to Present
Try arranging your homemade strawberry gummies in colorful glass jars or small decorative bags tied with ribbon — they make fantastic gifts or party favors! You can also layer them with chia seed jam or sprinkle crushed nuts on top to add texture and a gourmet touch.
Make Ahead and Storage
Storing Leftovers
After your gummies have set, store them in an airtight container in the fridge. This keeps them fresh and chewy for up to two weeks, making them a perfect make-ahead snack to satisfy cravings anytime.
Freezing
Freezing isn’t ideal for these gummies since the texture can change upon thawing. But if you want to store large batches, place them in a single layer on a parchment-lined tray, freeze until hard, then transfer to a freezer-safe container for up to one month.
Reheating
Reheating isn’t recommended for gummies since it can melt or alter their texture. Enjoy them fresh or chilled straight from the fridge for best chewy satisfaction.
FAQs
-
Can I use frozen strawberries instead of fresh for this recipe?
Yes! Frozen strawberries can work just fine, but make sure to thaw and drain any excess liquid before blending to keep the gummy mixture from becoming too watery.
-
How do I make these gummies vegan?
Swap the unflavored gelatin for a plant-based alternative like agar-agar powder and use a vegan sweetener such as maple syrup. Note that texture might vary slightly but will still be delicious.
-
Why are my gummies sticky after setting?
If your gummies feel sticky, dusting them lightly with cornstarch or powdered sugar can help reduce tackiness and separate them nicely.
-
Can I use other molds besides gummy bear shapes?
Absolutely! Any silicone mold will work beautifully — hearts, stars, or even fun holiday shapes. Just ensure they’re small enough for quick setting and easy popping out.
Final Thoughts
This Homemade Strawberry Gummies Recipe is a fantastic way to bring smiles and sweet moments to your day with wholesome ingredients and simple steps. Once you try making these chewy, fruity bites yourself, they’ll quickly become a beloved go-to snack in your home. Happy gummy making!
PrintHomemade Strawberry Gummies Recipe

These Homemade Strawberry Gummies are a delightful, naturally sweet treat made with fresh strawberries, raw honey, and gelatin. Perfect for a healthy snack or a fun dessert, these gummies are easy to prepare and require minimal ingredients. With a perfect balance of fruity flavor and chewy texture, they’re sure to satisfy your sweet tooth without any artificial additives.
- Prep Time: 15 minutes
- Cook Time: 15 minutes
- Total Time: 30 minutes
- Yield: 350 gummy bears
- Category: Dessert
- Method: Stovetop
- Cuisine: American
- Diet: Gluten Free
Ingredients
Fruits and Liquids
- 2 cups strawberries, diced
- 1 tbsp lemon juice
- 2 tbsp raw honey
Gelatin
- 2 (0.25 oz) boxes unflavored gelatin
Equipment
- Gummy bear molds
Instructions
- Blend the Strawberries: Place the diced strawberries, lemon juice, and honey into a blender. Blend thoroughly until the strawberries are fully broken down into a smooth mixture. If the mixture has many seeds, strain it through a fine mesh sieve to remove them for a smoother gummy texture.
- Heat and Add Gelatin: Pour the strawberry juice into a saucepan and place it over medium heat. Gradually add the unflavored gelatin while continuously whisking to ensure it dissolves completely. Bring the mixture to a gentle boil, then promptly remove it from the heat to prevent burning or gelatin degradation.
- Fill the Molds: Using the eyedropper provided with the gummy molds or a food squeeze bottle, carefully fill each mold cavity with the warm gelatin mixture. Take your time to avoid spills and ensure each mold is evenly filled.
- Chill to Set: Place the filled molds in the refrigerator for about 20 minutes to allow the gummies to firm up and solidify completely. To keep the remaining gummy mixture warm during this time, place your squeeze bottle in hot water or keep the saucepan on a warm surface.
- Remove and Enjoy: Once set, gently pop the strawberry gummies out of the molds. Enjoy this refreshing, chewy treat immediately or store them in the refrigerator for later snacking.
Notes
- Using raw honey provides natural sweetness and adds a unique flavor, but you can substitute with other natural sweeteners if preferred.
- If you want seedless gummies, straining the blended strawberry juice is key for smooth texture.
- Keep the gelatin mixture warm while filling molds to prevent it from solidifying prematurely.
- Store leftover gummies in an airtight container in the refrigerator for up to one week.
- Gelatin boxes are typically 0.25 ounces each; ensure you use unflavored gelatin to maintain the natural strawberry taste.


