
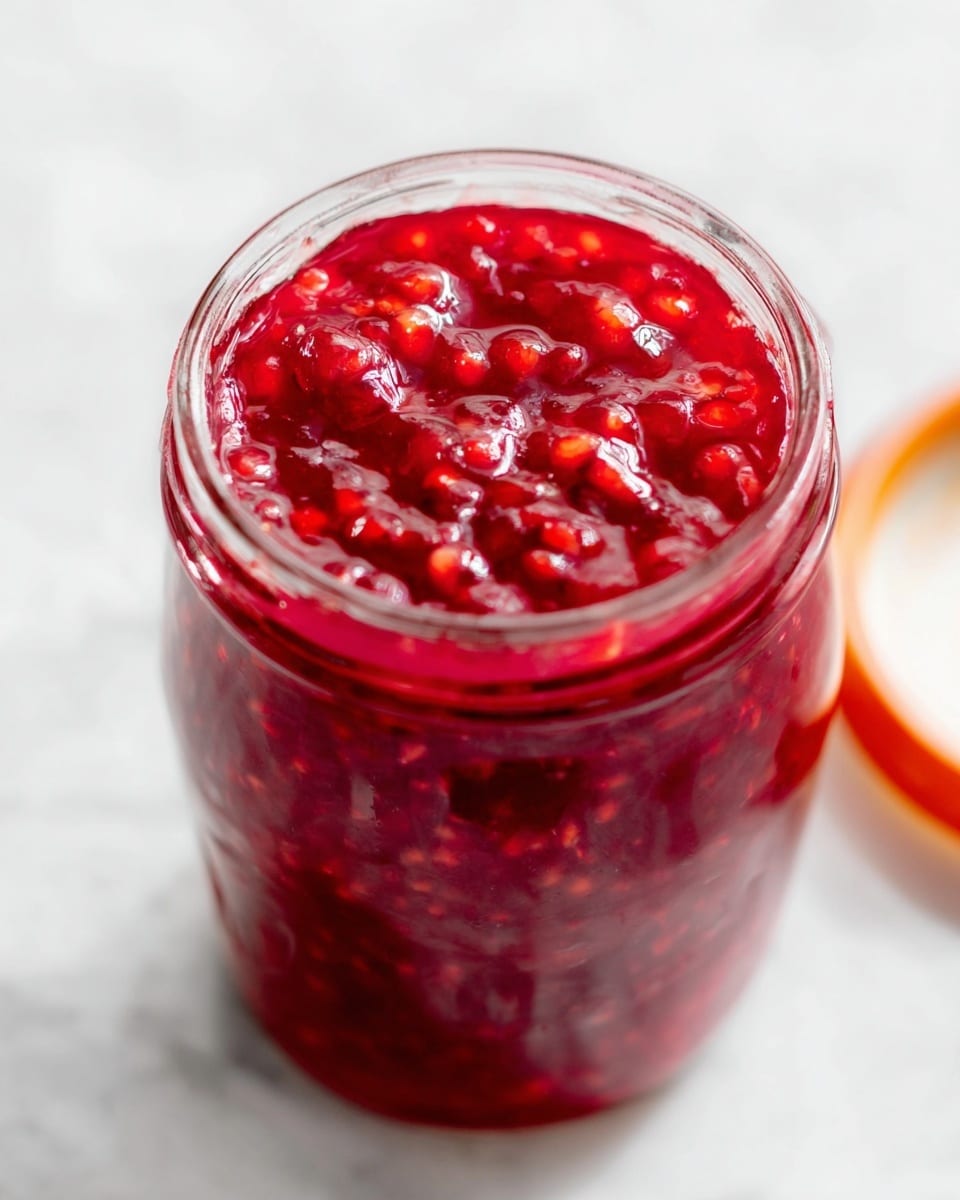
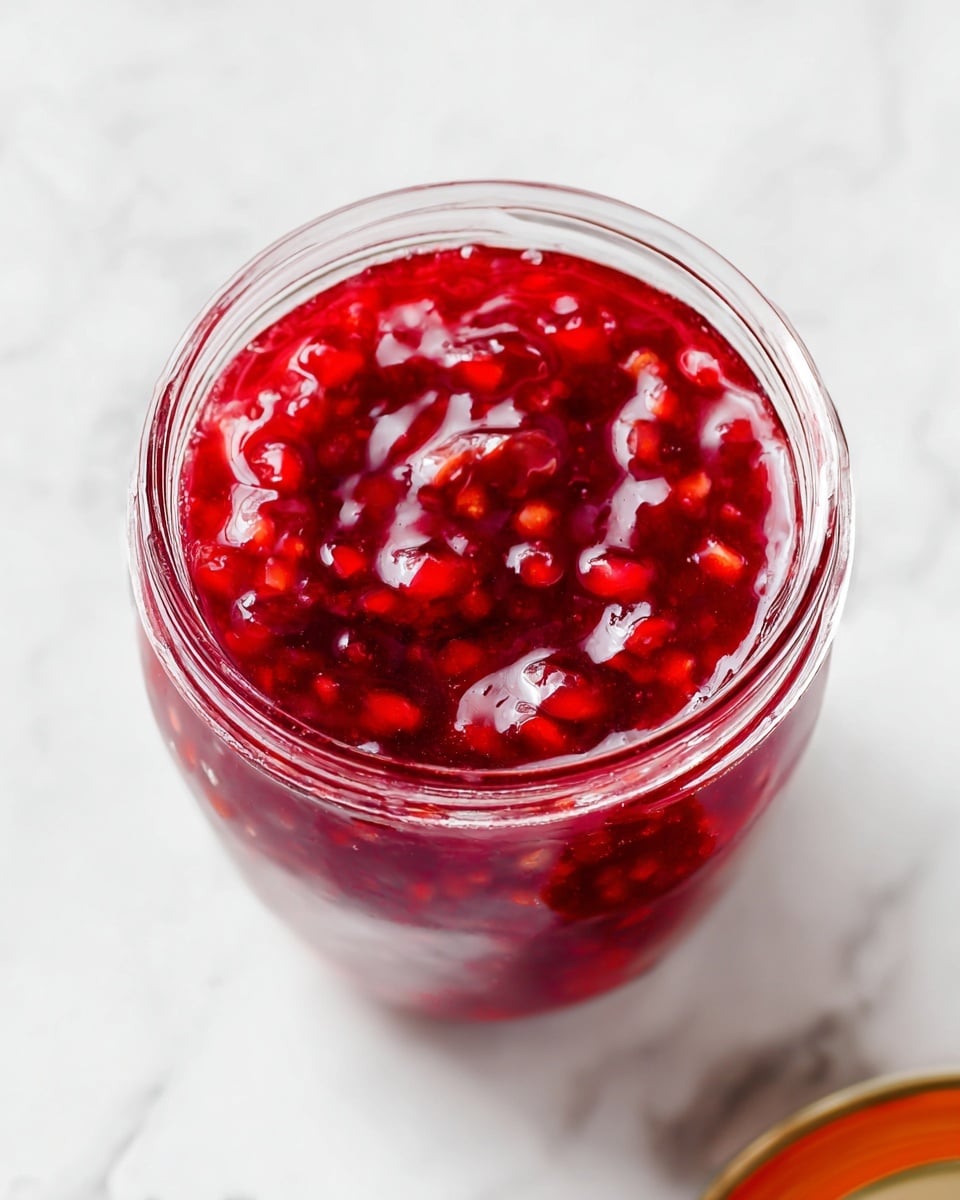
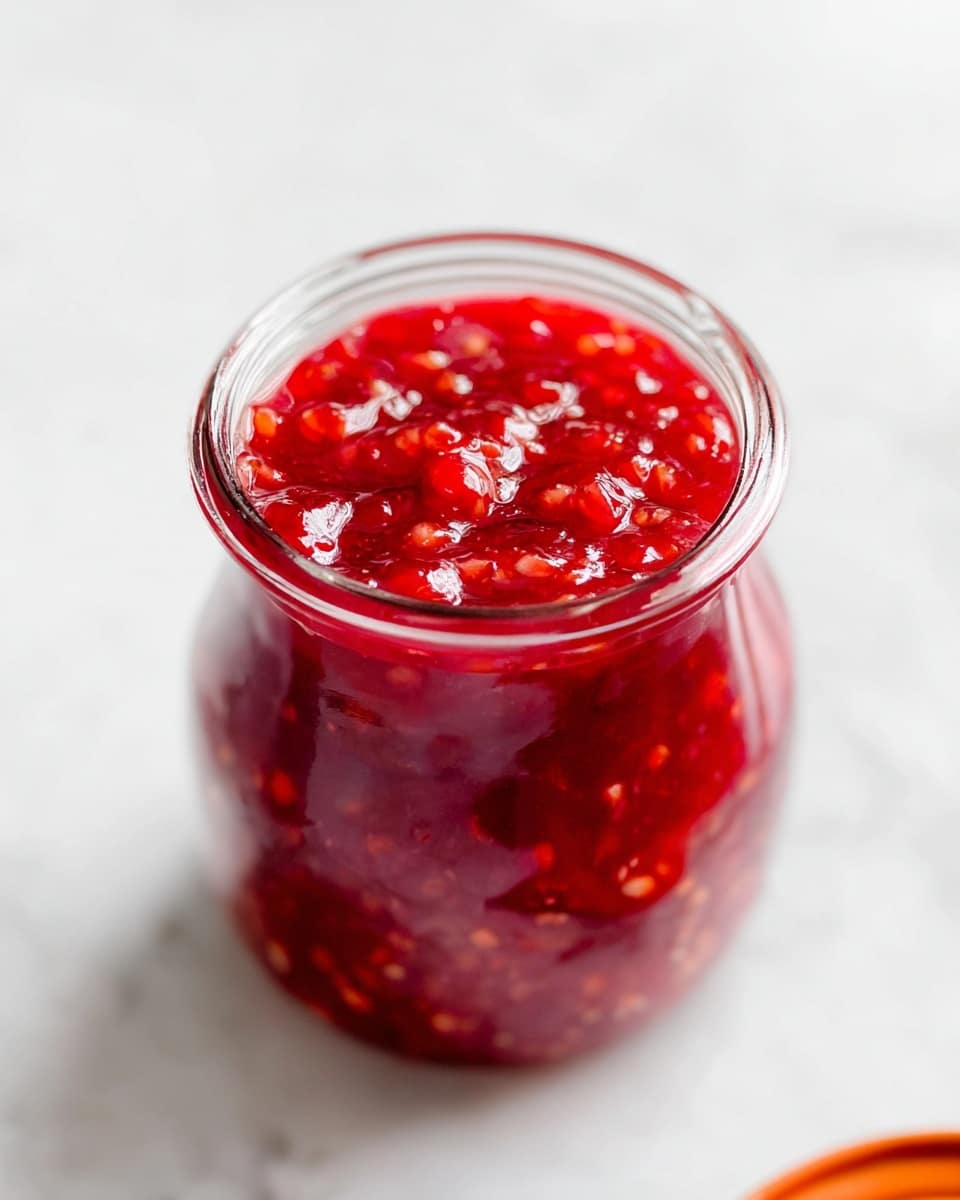
I absolutely love this Homemade Cherry Pie Filling Recipe because it transforms simple cherries into a luscious, vibrant topping or filling that takes any dessert to the next level. Whether you’re baking a classic cherry pie, topping pancakes, or stirring it into yogurt, this recipe’s bright, tart flavor and silky texture never fail to impress. You’ll find it incredibly satisfying to make from scratch — fresh or frozen cherries simmering down into this beautiful ruby-red mixture is such a comforting sight in my kitchen.
When I first tried making this filling, I discovered how easy and rewarding it is to control the sweetness and spice exactly to your liking. Plus, it’s ready in just about 15 minutes, which is perfect for those last-minute baking sessions or dessert emergencies. If you’ve been buying canned cherry pie filling, this Homemade Cherry Pie Filling Recipe will change your mind because it tastes fresher, cleaner, and has zero additives. Trust me, your pies, cobblers, and crisps will thank you.
Why You’ll Love This Recipe
- Quick & Easy: Ready in about 15 minutes, perfect for busy days.
- Customizable Sweetness: You control how sweet or tart it ends up.
- Versatile Use: Perfect for pies, tarts, pancakes, or as a simple fruit topping.
- Made From Scratch: No preservatives or artificial ingredients, just pure cherry goodness.
Ingredients You’ll Need
These ingredients come together harmoniously to create a thick, flavorful cherry filling. I like using either fresh or frozen sour cherries—the tartness is what shines here. A touch of cinnamon adds warmth without overpowering the cherries.
- Sour Cherries: Fresh is ideal, but frozen work great too and are convenient year-round.
- Cornstarch: This helps thicken the filling perfectly without making it gummy.
- Sugar: Adjust the amount depending on how tart your cherries are or your sweetness preference.
- Cinnamon: Just a pinch to add subtle spice and depth to the flavor.
Note: Exact ingredients and measurements are listed in the recipe card below.
Variations
I love tweaking my Homemade Cherry Pie Filling Recipe depending on the season and what I have on hand—you can make it your own easily. Adding zest or different spices can totally change the flavor profile to fit your mood or menu.
- Use Fresh or Frozen Cherries: Frozen cherries work just as well and sometimes have a deeper flavor from freezing.
- Spice It Up: Try adding a splash of vanilla extract or a pinch of nutmeg for a cozy twist that I adore in fall.
- Sweetener Swap: If you’re cutting back on sugar, maple syrup or honey are interesting alternatives but adjust quantities for sweetness.
- Thickener Alternatives: If you don’t have cornstarch, arrowroot or tapioca starch also works well.
How to Make Homemade Cherry Pie Filling Recipe
Step 1: Simmer Your Cherries
Start by placing your pitted cherries in a medium saucepan over medium heat. I love watching them soften and release their juices, which usually takes just a few minutes until it reaches a gentle simmer. This step is crucial because it helps intensify the cherry flavor and starts the aroma filling your kitchen—trust me, it’s the best part!
Step 2: Combine Your Thickening Mixture
While your cherries are heating, whisk together the cornstarch, sugar, and cinnamon in a small bowl. This dry mixture will thicken the filling swiftly when added, so make sure it’s well combined and lump-free. I discovered that taking this little extra step saves you from any gritty or uneven texture later.
Step 3: Add and Cook Until Thickened
Once your cherries are simmering, pour in the cornstarch mixture all at once and stir vigorously. Keep stirring constantly for a few minutes—the filling will quickly bubble and thicken beautifully. At this point, the color deepens and the texture becomes glossy and luscious. Remove it from heat promptly to avoid over-thickening or burning on the bottom.
Step 4: Cool and Use or Store
Let your homemade cherry pie filling cool at room temperature before using it in your favorite recipes. If you’re not baking right away, just refrigerate it in a jar or airtight container—it thickens more as it cools and the flavor intensifies overnight. I like to make a batch and have it ready for breakfasts and desserts throughout the week.
Pro Tips for Making Homemade Cherry Pie Filling Recipe
- Pitting Cherries Quickly: I use a straw or chopstick to push the pit right out—super fast and less sticky!
- Avoiding Lumps: Always mix cornstarch with dry sugar before adding to wet cherries to prevent clumping.
- Consistent Stirring: Stir non-stop once you add your cornstarch mixture to avoid burning and ensure smooth thickening.
- Taste Test Before Thickening: I always taste my cherries before thickening to adjust sugar on the fly, then add if needed.
How to Serve Homemade Cherry Pie Filling Recipe
Garnishes
My favorite garnishes are a sprinkle of flaky sea salt or a dollop of fresh whipped cream to balance the sweet-tart cherry filling. Sometimes I add a few slivered almonds or a light dusting of powdered sugar for visual appeal and a delicate crunch. It’s those little touches that make it feel special.
Side Dishes
I like serving this cherry pie filling alongside a flaky butter crust pie, vanilla ice cream, or even spooned over warm buttermilk pancakes. For something different, try it with a scoop of ricotta cheese or creamy mascarpone—it’s a combo that my family goes crazy for.
Creative Ways to Present
I’ve experimented with presenting this filling as mini cherry tarts or layered parfaits with yogurt and granola for brunch guests. For special occasions, try swirling the cherry filling through cheesecake batter before baking—it adds a gorgeous marbled effect and incredible flavor. Play around and see what works for your celebration!
Make Ahead and Storage
Storing Leftovers
I usually store leftover homemade cherry pie filling in a sealed glass jar in the fridge, where it lasts beautifully for up to a week. It thickens and the flavors deepen overnight, sometimes even tasting better the next day. Just give it a good stir before reheating or using.
Freezing
Freezing this filling works like a charm for longer storage. I portion it into airtight containers and freeze for up to 3 months. When I’m ready to use it, I thaw it overnight in the fridge and reheat gently on the stove, adding a splash of water if needed to loosen the texture.
Reheating
When reheating, do it over low heat with gentle stirring to keep the texture silky and avoid scorching. If the filling has thickened too much in the fridge, add a splash of water or cherry juice and stir until it reaches the perfect pourable consistency again. I always warm just enough to get it lively and fresh-tasting.
FAQs
-
Can I use sweet cherries instead of sour cherries?
Yes, you can, but sour cherries lend more traditional tartness to the filling which balances the sugar perfectly. If using sweet cherries, you might want to reduce the added sugar for a less sweet result.
-
What can I substitute for cornstarch?
Arrowroot powder or tapioca starch are great alternatives to cornstarch and will thicken the filling nicely without changing the flavor. Use the same amount as cornstarch for a similar result.
-
How long does homemade cherry pie filling last in the fridge?
Stored in an airtight container, it stays fresh for about one week in the refrigerator. For longer storage, freezing is a great option.
-
Can I use this filling for other desserts?
Absolutely! It works wonderfully in tarts, turnovers, as a topping for cheesecake, or even stirred into oatmeal or yogurt for a fruity boost.
Final Thoughts
Making this Homemade Cherry Pie Filling Recipe has become one of my favorite simple pleasures in the kitchen—there’s something so rewarding about turning a handful of cherries into a rich, flavorful filling that elevates so many desserts. Whether you’re a baking novice or a seasoned pro, I encourage you to try it and see how much more vibrant your treats can taste when using fresh, homemade filling. You’ll love having it on hand for spontaneous pies or a sweet spoonful whenever the craving hits.
PrintHomemade Cherry Pie Filling Recipe

This Homemade Cherry Pie Filling recipe is a quick and easy way to prepare a delicious, thick, and flavorful cherry filling perfect for pies, tarts, or desserts. Using fresh or frozen pitted sour cherries, combined with cornstarch, sugar, and a hint of cinnamon, this filling thickens on the stovetop in just minutes, making it an ideal make-ahead or last-minute ingredient for your baking needs.
- Prep Time: 5 minutes
- Cook Time: 10 minutes
- Total Time: 15 minutes
- Yield: 1 batch (enough for one 9-inch pie)
- Category: Dessert
- Method: Stovetop
- Cuisine: American
Ingredients
Fruits
- 4 cups Pitted Sour Cherries (fresh or frozen)
Thickening and Flavoring
- 1/4 cup Cornstarch
- 1 cup Sugar
- 1/2 teaspoon Cinnamon
Instructions
- Prepare the Cherries: Place the 4 cups of pitted sour cherries into a saucepan over medium heat. Cook the cherries until they reach a simmer, releasing their juices and softening slightly.
- Make the Thickening Mixture: In a small bowl, combine 1/4 cup cornstarch, 1 cup sugar, and 1/2 teaspoon cinnamon. Stir the mixture well to evenly distribute the ingredients.
- Thicken the Filling: Once the cherries are simmering, gradually pour the cornstarch, sugar, and cinnamon mixture into the saucepan while continuously stirring. Continue cooking until the filling bubbles and thickens to the desired consistency.
- Finish and Cool: Remove the saucepan from the heat. Allow the cherry pie filling to cool before using it as a filling in pies, tarts, or any dessert requiring cherry filling.
Notes
- Use fresh or frozen cherries according to availability; if using frozen cherries, do not thaw before cooking.
- Adjust sugar quantity based on the tartness of the cherries or personal preference for sweetness.
- This filling can be refrigerated for up to one week or frozen for longer storage.
- Add a splash of lemon juice or vanilla extract to enhance the flavor if desired.

