
If you’re on the hunt for a juicy, flavorful turkey breast that cooks up faster than the oven ever could, you’re going to adore this Air Fryer Herb-Seasoned Turkey Breast Recipe. Trust me, once you try turkey this tender with that perfect herby crust, you’ll never want to go back to traditional roasting. It’s a straightforward recipe, packed with fresh herbs and a few pantry staples, and the air fryer makes all the difference in crisping the skin and locking in moisture. Stick with me—I’ll share all my tips to make sure your turkey breast turns out just right, every single time.
Why You’ll Love This Recipe
- Quick & Easy: Uses your air fryer to get dinner on the table faster than roasting in the oven.
- Juicy & Flavorful: Fresh herbs and garlic infuse the turkey making it super tender and fragrant.
- Perfect Crispy Skin: The air fryer crisps skin beautifully, like no other method I’ve tried.
- Versatile: Works for bone-in or boneless turkey breast — your call depending on what you find at the store.

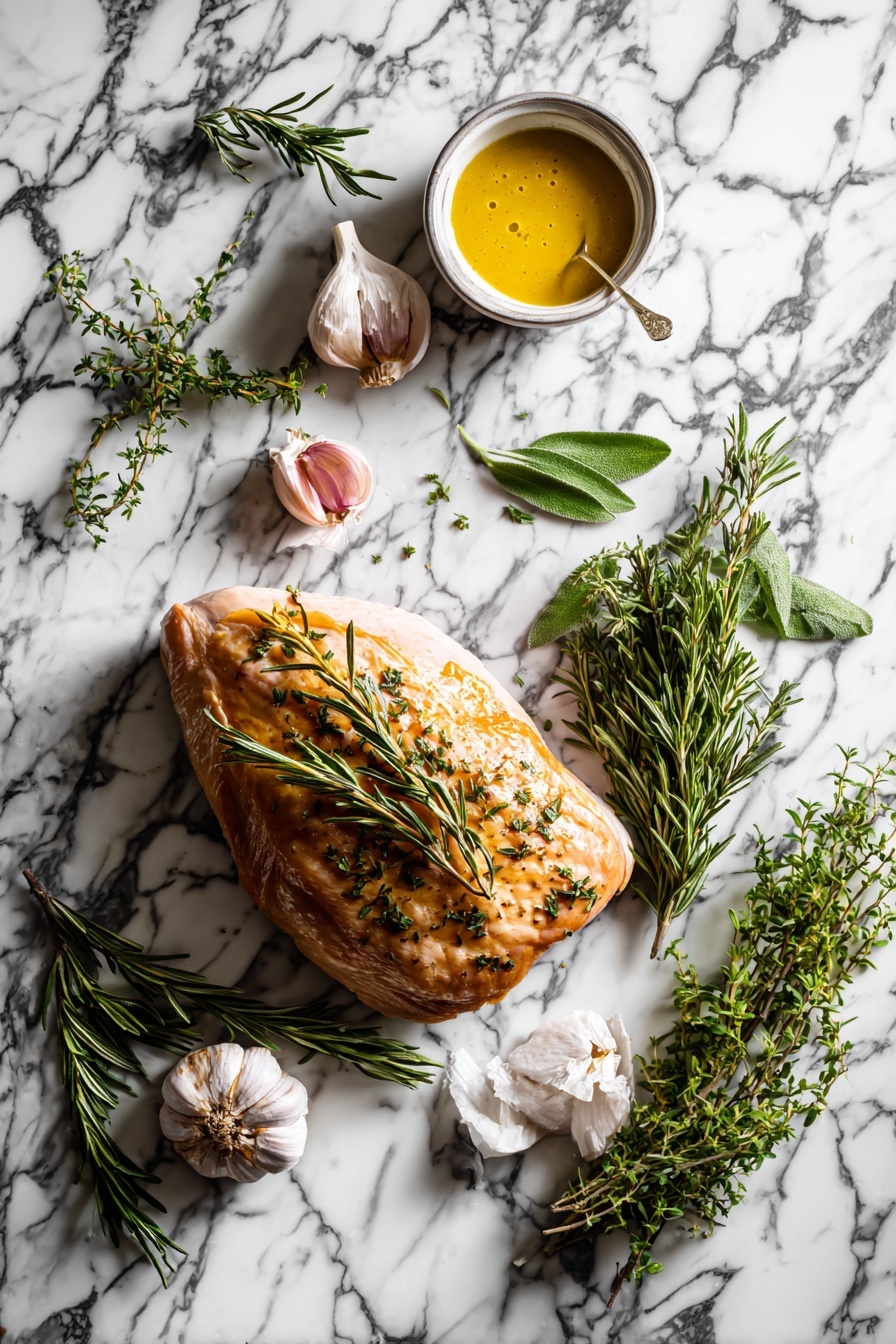
Ingredients & Why They Work
This Air Fryer Herb-Seasoned Turkey Breast Recipe keeps things simple but packs a punch with its fresh herb blend and Dijon mustard. The olive oil helps the seasonings adhere and promotes crisp skin, while the garlic adds that classic savory depth you expect from turkey. These ingredients work together to create beautiful aroma and flavor that feels fancy but is actually effortless.
- Turkey breast: Bone-in gives more flavor and stays juicy; boneless cooks a bit quicker and is easier to carve.
- Extra-virgin olive oil: Coats the skin for crispiness and helps hold the herb seasoning in place.
- Garlic: Freshly minced garlic amps up that savory goodness—you don’t want to skip it.
- Kosher salt: Essential for seasoning, it helps bring out the turkey’s natural flavor.
- Fresh rosemary, sage, thyme: Classic turkey herbs that impart earthy, fragrant notes you’ll savor.
- Black pepper: Adds a subtle kick for balance.
- Dijon mustard: Adds a gentle tang and helps the herbs stick to the turkey beautifully.
Note: Exact ingredients and measurements are listed in the recipe card below.
Make It Your Way
One of the best parts about this Air Fryer Herb-Seasoned Turkey Breast Recipe is how easy it is to tweak to your taste. I often play around by switching up herbs or adding a splash of lemon zest for brightness. Seriously, don’t be shy about adjusting seasoning to suit your mood or what’s fresh in your kitchen!
- Variation: I once swapped rosemary for tarragon for a slightly sweeter, anise-flavored twist, and it was unexpectedly delicious.
- Diet Friendly: This recipe is naturally gluten-free and low-carb, perfect if you’re watching those.
- Spice It Up: Add a pinch of cayenne or smoked paprika in the herb rub for a smoky warmth that’s perfect for fall dinners.
- Make It Citrus: A squeeze of fresh lemon juice after cooking adds fresh brightness that you might just fall in love with.
Step-by-Step: How I Make Air Fryer Herb-Seasoned Turkey Breast Recipe
Step 1: Prep Like a Pro
First things first, remove your turkey breast from the fridge and let it rest at room temperature for about 30 minutes. This little step is key because it helps the turkey cook evenly, so you won’t end up with dry edges and a raw center. While it’s warming up, pat it very dry using paper towels—dry skin means crispier texture later on.
Step 2: Whip Up the Herb Rub
In a small bowl, whisk together the olive oil, minced garlic, kosher salt, fresh rosemary, sage, thyme, black pepper, and Dijon mustard until you get a nice, even mixture. Smelling those fresh herbs and garlic mixed with mustard? It’s enough to make you hungry even before the turkey hits the fryer!
Step 3: Coat That Turkey
Rub the herb mixture all over the turkey breast, making sure to get under the skin a bit if you can—this is where so much flavor locks in. Don’t be shy; this step sets up the entire taste profile.
Step 4: Air Fry Like a Boss
Preheat your air fryer to 350°F (175°C) for at least 5 minutes. Place the turkey breast in the basket skin-side down and cook for 20 minutes. Then carefully flip it over—this ensures the skin crisps evenly. Continue cooking for another 30 to 50 minutes depending on your turkey size (bone-in cooks quicker than boneless). Use an instant-read thermometer—when it hits 155°F in the thickest part, it’s ready to come out. Remember, the turkey will keep cooking as it rests, so don’t let the temp climb too high or you’ll dry it out!
Step 5: Rest and Carve
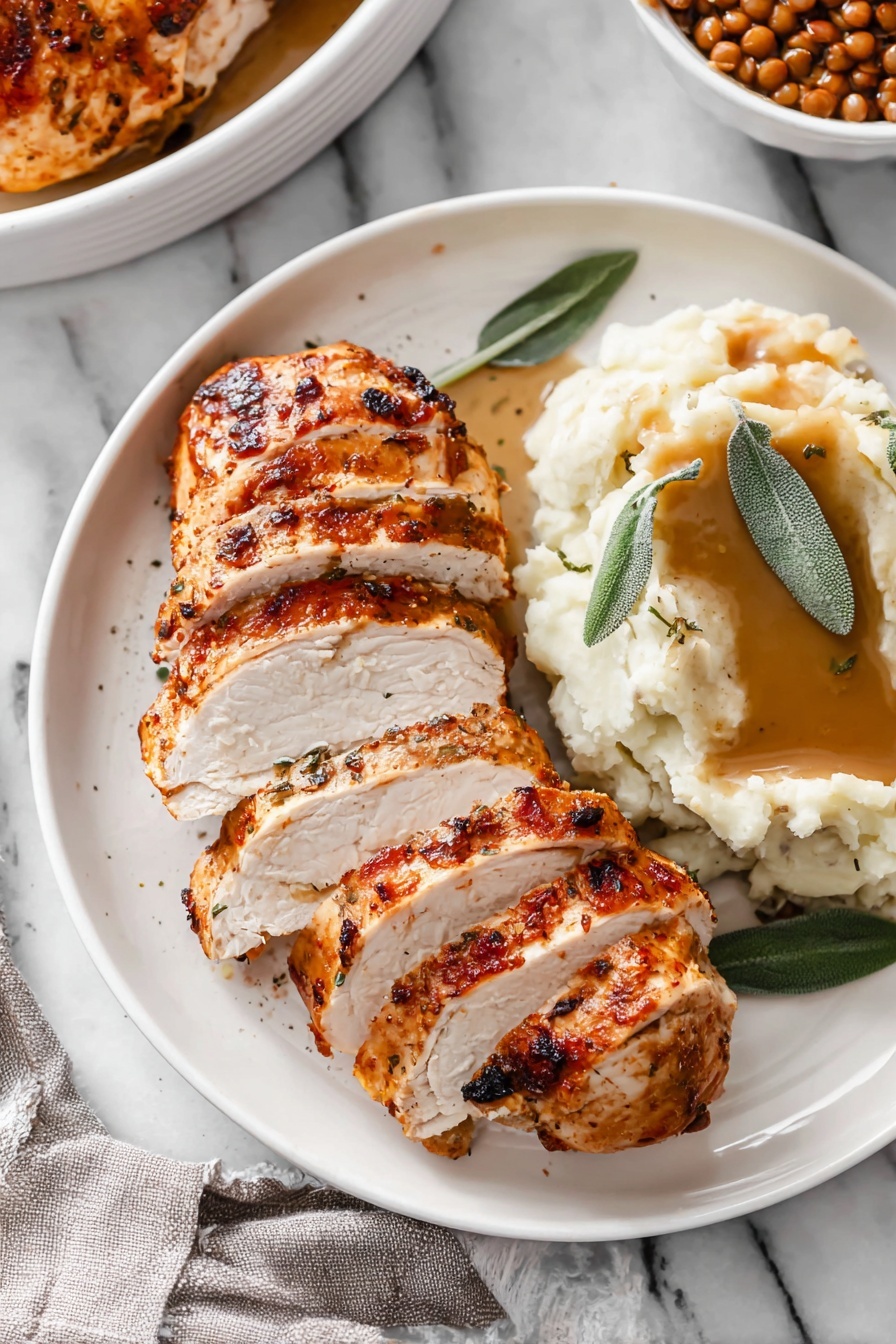
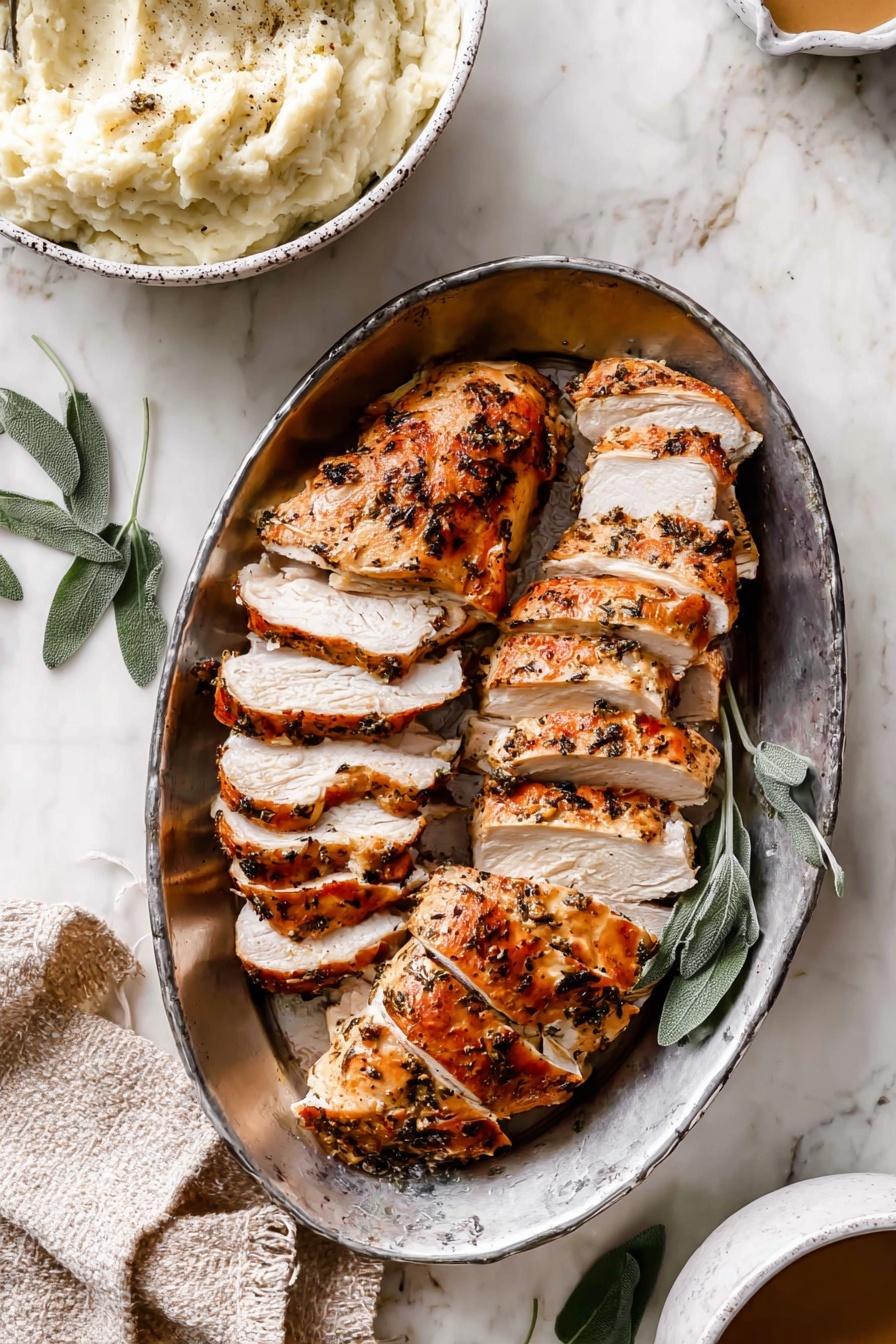
Once out of the air fryer, tent the turkey with foil and let it rest for at least 15 minutes. This resting period lets the juices redistribute so your slices stay moist and flavorful. When carving, use a sharp knife to cut along the bone and carve slices on a cutting board. Trust me, this method makes slicing so much easier and beautiful.
Pro Tips for Making Air Fryer Herb-Seasoned Turkey Breast Recipe
- Room Temperature Turkey: Always take your turkey out of the fridge before cooking—the temperature difference helps cook the meat evenly.
- Don’t Skip the Resting: This step ensures juicy slices and prevents dry, tough turkey.
- Use a Thermometer: To avoid overcooking, check the internal temp at 155°F and then rest—the carryover heat finishes the job perfectly.
- Flip Midway: Flipping the turkey halfway cooks the skin evenly—don’t rush this step to get that crisp all around.
How to Serve Air Fryer Herb-Seasoned Turkey Breast Recipe
Garnishes
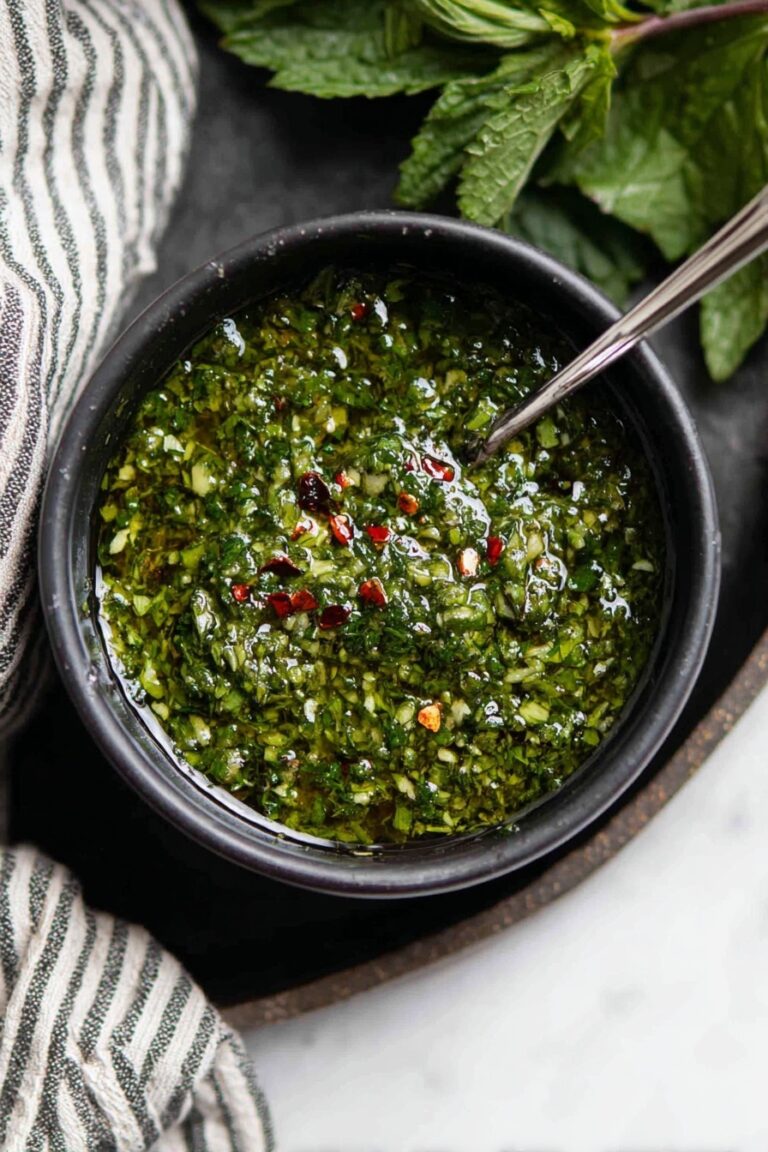
I love sprinkling a little fresh chopped parsley or thyme over the carved turkey—adds that fresh green pop and an herby aroma. Sometimes, I drizzle a tiny bit of good quality extra virgin olive oil to finish it off with a glossy shine. A wedge of lemon on the side can brighten every bite if you like a little tang.
Side Dishes
This turkey pairs beautifully with classic mashed potatoes or creamy mushroom gravy (optional, but highly recommended). Roasted root vegetables or a simple green salad give a lovely contrast in texture. For a lighter option, steamed green beans or asparagus with a touch of butter and garlic feel just right.
Creative Ways to Present
For special occasions, I like to serve the sliced turkey breast on a large wooden board surrounded by fresh herbs, lemon slices, and roasted garlic cloves. It feels festive and inviting—guests love it! Or you can slice it thinly, layer on crusty bread with cranberry sauce for a beautiful open-faced sandwich platter.
Make Ahead and Storage
Storing Leftovers
I tightly wrap leftover turkey in foil or store in an airtight container and keep it in the fridge for up to 3 days. I find wrapping it well is key to keeping the meat moist and preventing it from drying out.
Freezing
This recipe freezes beautifully if you want to make ahead. Just slice the turkey, pack in freezer-safe bags with the juices, and freeze. It keeps well for up to 2 months. When you’re ready, thaw overnight in the fridge before reheating.
Reheating
To reheat leftovers, pop the slices in a covered dish in a 300°F oven or air fryer for about 10-15 minutes until warmed through. Covering keeps it moist. You can also gently reheat in a skillet with a bit of broth for extra juiciness.
FAQs
-
Can I use a frozen turkey breast for this Air Fryer Herb-Seasoned Turkey Breast Recipe?
I recommend thawing the turkey breast completely before air frying. Cooking from frozen will result in uneven cooking and a less desirable texture. Planning ahead and thawing overnight in the fridge ensures even, juicy results.
-
How do I know when the turkey breast is done in the air fryer?
The best way is to use an instant-read meat thermometer inserted into the thickest part of the breast without touching bone. When it reaches 155°F, take it out and let it rest; carryover heat will bring it up to 165°F, the safe internal temp for poultry.
-
Can I double this recipe if I have a bigger air fryer?
If your air fryer basket fits two smaller turkey breasts without crowding, go for it! Just make sure there’s enough space for air circulation so both cook evenly. Otherwise, cook in batches for the best results.
-
What can I serve instead of mushroom gravy?
If you’re not a mushroom gravy fan, try a simple pan sauce made from turkey drippings, a splash of white wine, and some fresh herbs. Cranberry sauce also pairs wonderfully for a touch of sweetness and tartness.
Final Thoughts
This Air Fryer Herb-Seasoned Turkey Breast Recipe is one of those gems that I keep coming back to because it delivers on flavor, juiciness, and ease every time. Whether it’s a weeknight dinner or a small holiday feast, this recipe makes the whole process enjoyable and the results outstanding. I’m excited for you to try it and add your own little flair—let me know how it turns out for you, because this recipe really feels like a friend in the kitchen!
PrintAir Fryer Herb-Seasoned Turkey Breast Recipe

This Air Fryer Turkey Breast Recipe offers a juicy, flavorful turkey breast cooked to perfection using an air fryer. The turkey is seasoned with fresh herbs and garlic, then air fried for a crispy skin and tender interior, making it ideal for quick, delicious meals without the need for an oven. Perfect for a small family gathering or holiday meal.
- Prep Time: 10 minutes
- Cook Time: 50 minutes
- Total Time: 1 hour 15 minutes
- Yield: 6 servings
- Category: Main Course
- Method: Air Frying
- Cuisine: American
Ingredients
Turkey
- 1 (4-to 6-pound) bone-in, skin on turkey breast with ribs removed or 1 (3-pound) boneless roast
Seasoning
- 2 tablespoons extra-virgin olive oil
- 2 cloves garlic, minced
- 2 teaspoons kosher salt
- 2 teaspoons chopped fresh rosemary leaves
- 2 teaspoons chopped fresh sage leaves
- 1 teaspoon chopped fresh thyme leaves
- 1/2 teaspoon freshly ground black pepper
- 1 teaspoon Dijon mustard
Optional
- Mushroom gravy for serving
Instructions
- Prepare the Turkey: Remove the turkey from the refrigerator and allow it to stand at room temperature for 30 minutes. Pat the turkey very dry using paper towels to ensure crispiness during cooking.
- Preheat the Air Fryer: Preheat your air fryer to 350 degrees Fahrenheit for at least 5 minutes to ensure even cooking.
- Make the Herb Mixture: In a small bowl, whisk together extra-virgin olive oil, minced garlic, kosher salt, chopped fresh rosemary, sage, thyme, black pepper, and Dijon mustard until well combined.
- Season the Turkey: Rub the herb and oil mixture evenly all over the turkey breast, ensuring full coverage for maximum flavor.
- Air Fry – First Side: Place the turkey in the air fryer basket skin-side down. Cook for 20 minutes to achieve initial browning on the skin.
- Flip the Turkey: Carefully remove the air fryer basket and flip the turkey over to cook the other side evenly.
- Air Fry – Second Side: Continue cooking for an additional 30 to 50 minutes. Use an instant-read thermometer inserted into the thickest part without touching bone to check for 155 degrees Fahrenheit. The turkey will reach FDA recommended temperature of 165°F while resting.
- Rest the Turkey: Remove the turkey from the air fryer, place it on a cutting board, and cover loosely with foil. Let it rest for at least 15 minutes to allow juices to redistribute.
- Carve the Turkey: Using a large sharp knife, cut each side of the breast away from the bone by slicing along the breastbone with long, even strokes. Lift the meat in one piece and slice crosswise into desired thickness.
- Serve: Repeat carving for the other side and remaining meat. Serve the turkey hot or at room temperature, optionally with mushroom gravy.
Notes
- If using a turkey breast with ribs attached, place it skin-side up in the air fryer basket and adjust cooking time as necessary.
- Do not overcook the turkey; pulling it at 155°F allows carryover cooking to reach safe temperature and keeps meat juicy.
- Letting the turkey rest covered after cooking is essential for tender meat and easier carving.
- Boneless turkey breasts may require a longer cooking time than bone-in.
- Ensure the air fryer basket is not overcrowded for proper air circulation and even cooking.
- Use a meat thermometer to check doneness accurately rather than relying solely on timing.


