- Whole Turkey: A fresh or fully thawed 12-pound turkey works best for even grilling and flavor absorption.
- Extra-Virgin Olive Oil: Use a good quality oil to rub the skin and help achieve crispy, golden-brown skin.
- Kosher Salt: Essential for properly seasoning the turkey and drawing out the natural flavors.
- Black Pepper: Freshly ground adds a warm, sharp bite to balance the buttery richness.
- Unsalted Butter: I like unsalted so I can control the salt level perfectly with the kosher salt.
- Garlic: Grated or minced for that fragrant base in the herb butter mixture.
- Lemon (Zest and Juice): Gives the herb butter a bright, fresh pop that complements the herbs beautifully.
- Fresh Parsley, Rosemary, Sage, Thyme: These classic herbs bring earthy, aromatic notes that make the turkey sing.
- Low-Sodium Turkey Stock: Pouring this into the roasting pan helps keep the turkey moist while grilling.
- Optional Garnishes: Fresh thyme sprigs and grilled lemon halves for a pretty presentation and extra flavor.
Note: Exact ingredients and measurements are listed in the recipe card below.
Variations
I love tweaking this Grilled Herb-Butter Turkey Recipe depending on the season or occasion. It’s surprisingly adaptable, so don’t hesitate to make it your own!
- Herb Swap: Sometimes I use tarragon or oregano if I’m feeling adventurous or want a twist on the traditional blend.
- Spicier Kick: Adding a pinch of smoked paprika or cayenne to the butter mix brings a lovely smoky heat.
- Butter Compound: Try swapping regular butter for a garlic-parmesan butter for richer flavor.
- Diet-Friendly: You can go lighter by trimming some skin and using olive oil spray instead of butter basting.
How to Make Grilled Herb-Butter Turkey Recipe
Step 1: Prep and Season the Turkey
First things first—preheat your grill to about 400°F. This gets it hot enough to give the turkey a nice sear. Rub the whole turkey all over with extra-virgin olive oil; this helps the skin crisp up and locks in moisture. Don’t be shy with kosher salt and freshly ground black pepper—season every side generously. I usually pat the bird dry before rubbing it with oil to make sure the skin gets perfectly crispy.
Step 2: Make the Herb-Butter Mixture
While the grill is heating, melt unsalted butter in a small pot over medium-high heat. Stir in grated garlic, lemon zest and juice, and all the chopped fresh herbs—parsley, rosemary, sage, and thyme. This mixture smells divine and tastes even better when brushed on the turkey. Set it aside off the heat so the butter stays warm but doesn’t cook the herbs.
Step 3: Start Grilling for Char Marks
Place the turkey breast side down directly on the hot grill grate. Grill it for 5 to 10 minutes to get those satisfying char marks—this helps develop flavor and locks in juices. Using large tongs, carefully turn the turkey over and grill the other side for another 5 to 10 minutes until good grill lines develop. This initial sear is what really elevates the grilled turkey experience.
Step 4: Transfer and Begin Slow Grilling
Carefully move the turkey into a large aluminum roasting pan and pour in the low-sodium turkey stock. This creates a steamy environment to keep your turkey juicy and tender as it cooks through. Start brushing the bird with the herb-butter mixture you prepared earlier, getting under the wings and into the crevices whenever possible. Close the grill lid and let the magic happen.
Step 5: Grill Low and Slow, Basting Often
Grill the turkey for about 2½ hours, basting generously every 30 minutes with the warm herb butter. This constant basting is a game changer for keeping the skin flavorful and the meat moist. Use a reliable instant-read thermometer to check for doneness—the thickest part of the breast should register 165°F. If your grill has hot spots, rotate the pan occasionally to avoid uneven cooking.
Step 6: Rest and Serve
Once the turkey hits that safe internal temp, transfer it to a platter and let it rest for about 30 minutes before carving. Resting allows the juices to redistribute so you won’t lose all that delicious moisture when slicing. Serve the turkey garnished with fresh thyme sprigs and grilled lemon halves if you like—both add a lovely aroma and look stunning on the table.
Pro Tips for Making Grilled Herb-Butter Turkey Recipe
- Room Temp Turkey: Let your turkey sit at room temperature for 30 minutes before grilling to ensure even cooking throughout.
- Reserve Herb Butter: Always save some herb butter to baste during grilling—it keeps the skin beautifully glossy and tasty.
- Use a Thermometer: I never skip the instant-read thermometer; it’s the only way to guarantee perfectly cooked turkey every time.
- Avoid Overcrowding the Grill: Make sure the turkey has space for air circulation to cook evenly and get that coveted char.
How to Serve Grilled Herb-Butter Turkey Recipe
Garnishes
I like to keep garnishes simple but elegant. Fresh thyme sprigs scattered on the platter add a wonderful fragrance that complements what’s already in the herb butter. Grilled lemon halves serve double duty—they look beautiful and guests can squeeze extra citrus over their slices for a bright finish. If you’re feeling fancy, a few sprigs of rosemary also work great for the presentation.
Side Dishes
For sides, my go-tos are creamy mashed potatoes or a garlic mashed cauliflower for a lighter option. Roasted root vegetables tossed in olive oil and herbs tie in nicely with the turkey’s flavors. A crisp green salad with a lemon vinaigrette also balances the richness of the butter and makes the meal feel fresh and complete.
Creative Ways to Present
One of my favorite ways to jazz up presentation for a special occasion is to carve the turkey onto a large wooden board surrounded by a bed of fresh herbs and edible flowers. Another time, I arranged slices artistically over a platter layered with grilled lemon slices and sprigs of thyme. It really makes the meal feel festive and inviting for guests!
Make Ahead and Storage
Storing Leftovers
I wrap leftover turkey tightly in foil or airtight containers and store it in the refrigerator. It usually lasts me about 3 to 4 days before I need to eat it up or freeze it. The herb butter and stock basting really help the leftovers stay moist even after a few days in the fridge.
Freezing
You can absolutely freeze carved turkey pieces from this Grilled Herb-Butter Turkey Recipe. I like to portion them into freezer bags with some leftover herbs or a bit of the drippings poured in for moisture. When properly sealed, turkey freezes well for up to 3 months without losing much flavor or texture.
Reheating
To reheat, I gently warm the turkey in a covered baking dish with a splash of broth or leftover herb butter added on top to prevent drying out. Cover with foil and heat at 300°F until just warmed through. This low and slow reheating method keeps the turkey juicy and tender without overcooking.
FAQs
-
Can I use a smaller or larger turkey for this grilled herb-butter turkey recipe?
Absolutely! You can adjust cooking times depending on the size of your turkey. For smaller birds, reduce cooking time accordingly, and for larger birds, increase it. Always rely on an instant-read thermometer to confirm the turkey reaches 165°F internal temperature to ensure it’s fully cooked and safe.
-
Do I need to brine the turkey before grilling?
Brining is optional but can add extra moisture and flavor. Since this recipe uses a flavorful herb-butter basting and turkey stock during grilling, you might find brining unnecessary. However, if you have time, a simple brine can enhance tenderness and juiciness even more.
-
What if I don’t have a large enough grill for the whole turkey?
If your grill can’t fit the entire turkey, consider spatchcocking it (removing the backbone and flattening it). This reduces cooking time and makes the bird more manageable on smaller grills while still allowing excellent heat circulation and char formation.
-
Can I prepare the herb butter ahead of time?
Yes! Preparing the herb butter a day ahead lets the flavors meld and makes grilling day stress-free. Just store it covered in the fridge and warm gently before basting to return it to liquid form.
-
How do I know when the turkey is done on the grill?
The best way is using an instant-read thermometer inserted into the thickest part of the breast without touching bone. A reading of 165°F means the turkey is perfectly cooked. Avoid guessing by time alone, as grills may have hot spots and cooking speeds vary.
Final Thoughts
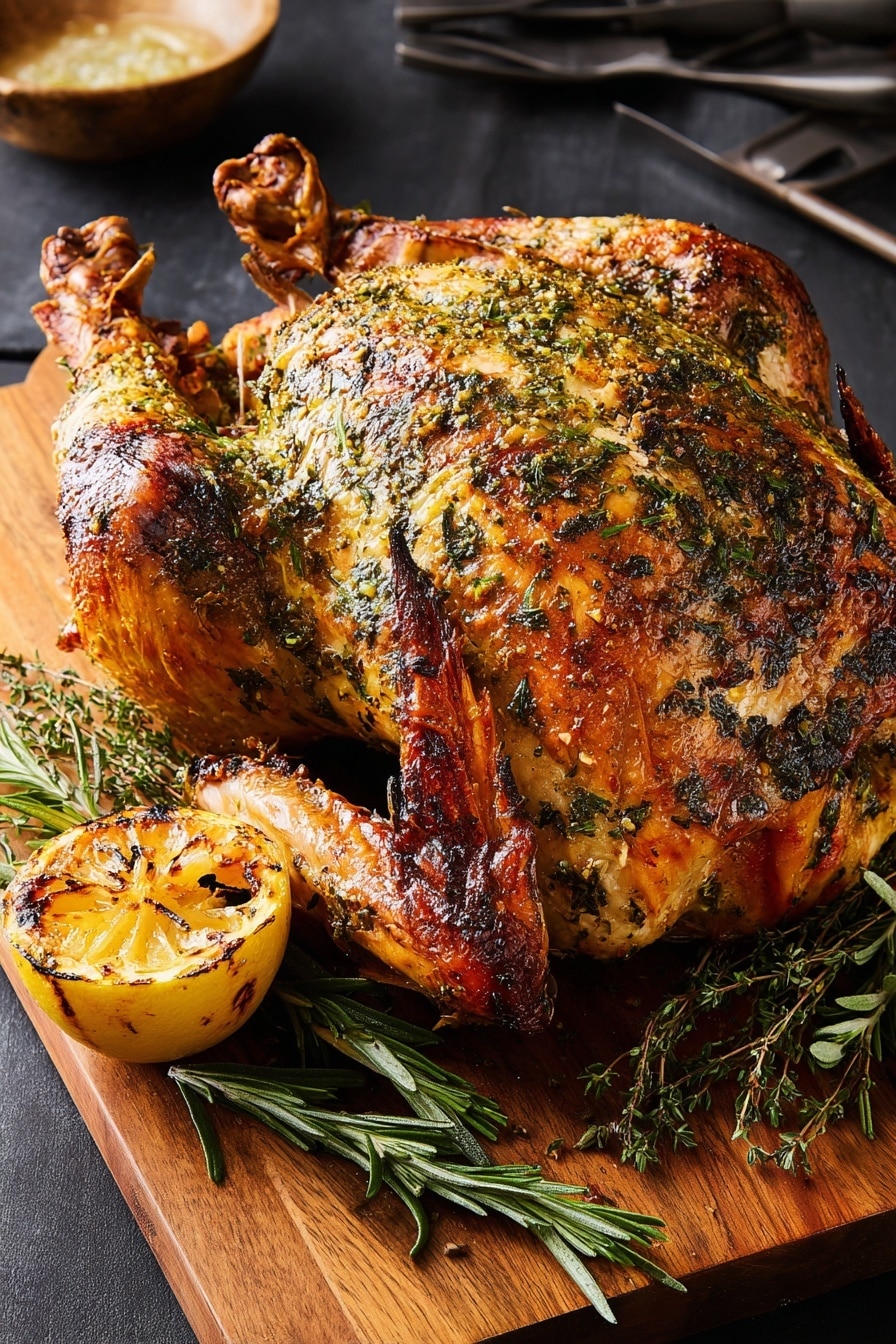
I absolutely love how this Grilled Herb-Butter Turkey Recipe turns out every single time—it’s juicy, flavorful, and gives you that beautiful grilled finish that feels so special. When I first tried grilling a whole turkey, I was nervous, but this method soon became my favorite for holidays and backyard dinners alike. I hope you’ll enjoy making this recipe as much as I do; it’s really one of the best ways to enjoy turkey with a fresh, flavorful twist. Trust me, your family and guests will go crazy for it!
This Grilled Herb-Butter Turkey Recipe truly holds a special place in my heart—and my family’s dinner rotation. There’s something magical about grilling a whole turkey that brings out deep, smoky flavors while keeping the meat incredibly juicy and tender. It’s a fantastic alternative to the usual oven-roasted bird, especially when you want that perfect outdoor cooking vibe without sacrificing taste or texture.
What I love most about this recipe is how the herb-butter mix seeps into every nook and cranny, infusing the turkey with bright notes of lemon and fragrant fresh herbs. Whether you’re grilling for a holiday feast or just an adventurous weekend meal, you’ll find that this Grilled Herb-Butter Turkey Recipe delivers flavor and wow-factor in equal measure. Plus, if you’ve ever been intimidated by grilling a whole bird, I promise this is easier than it looks!
Why You’ll Love This Recipe
- Juicy, Flavor-Packed Turkey: The herb-butter keeps the meat moist and infuses it with bold, fresh flavors.
- Perfect for Grilling Enthusiasts: It gives you that smoky, grilled edge that oven roasting just can’t match.
- Great for Special Occasions and Family Meals: Impress your guests with a beautiful, golden grilled turkey.
- Simple Yet Elegant: Uses everyday ingredients but delivers restaurant-quality results at home.
Ingredients You’ll Need
The ingredients are straightforward but powerful together. Fresh herbs and lemon brighten the rich butter, while turkey stock helps keep the bird juicy during grilling. A few tips on picking the best items for this recipe below:
- Whole Turkey: A fresh or fully thawed 12-pound turkey works best for even grilling and flavor absorption.
- Extra-Virgin Olive Oil: Use a good quality oil to rub the skin and help achieve crispy, golden-brown skin.
- Kosher Salt: Essential for properly seasoning the turkey and drawing out the natural flavors.
- Black Pepper: Freshly ground adds a warm, sharp bite to balance the buttery richness.
- Unsalted Butter: I like unsalted so I can control the salt level perfectly with the kosher salt.
- Garlic: Grated or minced for that fragrant base in the herb butter mixture.
- Lemon (Zest and Juice): Gives the herb butter a bright, fresh pop that complements the herbs beautifully.
- Fresh Parsley, Rosemary, Sage, Thyme: These classic herbs bring earthy, aromatic notes that make the turkey sing.
- Low-Sodium Turkey Stock: Pouring this into the roasting pan helps keep the turkey moist while grilling.
- Optional Garnishes: Fresh thyme sprigs and grilled lemon halves for a pretty presentation and extra flavor.
Note: Exact ingredients and measurements are listed in the recipe card below.
Variations
I love tweaking this Grilled Herb-Butter Turkey Recipe depending on the season or occasion. It’s surprisingly adaptable, so don’t hesitate to make it your own!
- Herb Swap: Sometimes I use tarragon or oregano if I’m feeling adventurous or want a twist on the traditional blend.
- Spicier Kick: Adding a pinch of smoked paprika or cayenne to the butter mix brings a lovely smoky heat.
- Butter Compound: Try swapping regular butter for a garlic-parmesan butter for richer flavor.
- Diet-Friendly: You can go lighter by trimming some skin and using olive oil spray instead of butter basting.
How to Make Grilled Herb-Butter Turkey Recipe
Step 1: Prep and Season the Turkey
First things first—preheat your grill to about 400°F. This gets it hot enough to give the turkey a nice sear. Rub the whole turkey all over with extra-virgin olive oil; this helps the skin crisp up and locks in moisture. Don’t be shy with kosher salt and freshly ground black pepper—season every side generously. I usually pat the bird dry before rubbing it with oil to make sure the skin gets perfectly crispy.
Step 2: Make the Herb-Butter Mixture
While the grill is heating, melt unsalted butter in a small pot over medium-high heat. Stir in grated garlic, lemon zest and juice, and all the chopped fresh herbs—parsley, rosemary, sage, and thyme. This mixture smells divine and tastes even better when brushed on the turkey. Set it aside off the heat so the butter stays warm but doesn’t cook the herbs.
Step 3: Start Grilling for Char Marks
Place the turkey breast side down directly on the hot grill grate. Grill it for 5 to 10 minutes to get those satisfying char marks—this helps develop flavor and locks in juices. Using large tongs, carefully turn the turkey over and grill the other side for another 5 to 10 minutes until good grill lines develop. This initial sear is what really elevates the grilled turkey experience.
Step 4: Transfer and Begin Slow Grilling
Carefully move the turkey into a large aluminum roasting pan and pour in the low-sodium turkey stock. This creates a steamy environment to keep your turkey juicy and tender as it cooks through. Start brushing the bird with the herb-butter mixture you prepared earlier, getting under the wings and into the crevices whenever possible. Close the grill lid and let the magic happen.
Step 5: Grill Low and Slow, Basting Often
Grill the turkey for about 2½ hours, basting generously every 30 minutes with the warm herb butter. This constant basting is a game changer for keeping the skin flavorful and the meat moist. Use a reliable instant-read thermometer to check for doneness—the thickest part of the breast should register 165°F. If your grill has hot spots, rotate the pan occasionally to avoid uneven cooking.
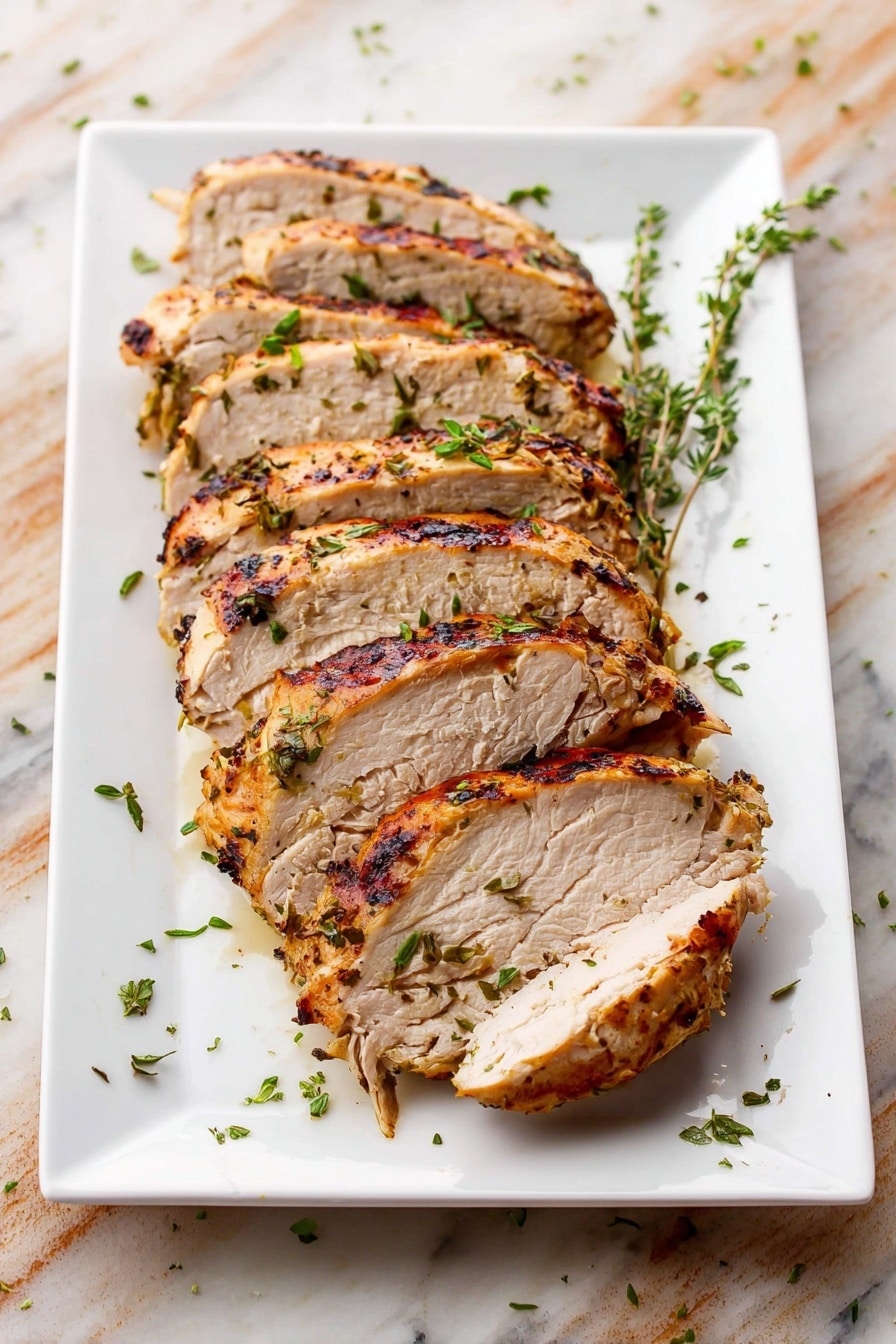
Step 6: Rest and Serve
Once the turkey hits that safe internal temp, transfer it to a platter and let it rest for about 30 minutes before carving. Resting allows the juices to redistribute so you won’t lose all that delicious moisture when slicing. Serve the turkey garnished with fresh thyme sprigs and grilled lemon halves if you like—both add a lovely aroma and look stunning on the table.
Pro Tips for Making Grilled Herb-Butter Turkey Recipe
- Room Temp Turkey: Let your turkey sit at room temperature for 30 minutes before grilling to ensure even cooking throughout.
- Reserve Herb Butter: Always save some herb butter to baste during grilling—it keeps the skin beautifully glossy and tasty.
- Use a Thermometer: I never skip the instant-read thermometer; it’s the only way to guarantee perfectly cooked turkey every time.
- Avoid Overcrowding the Grill: Make sure the turkey has space for air circulation to cook evenly and get that coveted char.
How to Serve Grilled Herb-Butter Turkey Recipe
Garnishes
I like to keep garnishes simple but elegant. Fresh thyme sprigs scattered on the platter add a wonderful fragrance that complements what’s already in the herb butter. Grilled lemon halves serve double duty—they look beautiful and guests can squeeze extra citrus over their slices for a bright finish. If you’re feeling fancy, a few sprigs of rosemary also work great for the presentation.
Side Dishes
For sides, my go-tos are creamy mashed potatoes or a garlic mashed cauliflower for a lighter option. Roasted root vegetables tossed in olive oil and herbs tie in nicely with the turkey’s flavors. A crisp green salad with a lemon vinaigrette also balances the richness of the butter and makes the meal feel fresh and complete.
Creative Ways to Present
One of my favorite ways to jazz up presentation for a special occasion is to carve the turkey onto a large wooden board surrounded by a bed of fresh herbs and edible flowers. Another time, I arranged slices artistically over a platter layered with grilled lemon slices and sprigs of thyme. It really makes the meal feel festive and inviting for guests!
Make Ahead and Storage
Storing Leftovers
I wrap leftover turkey tightly in foil or airtight containers and store it in the refrigerator. It usually lasts me about 3 to 4 days before I need to eat it up or freeze it. The herb butter and stock basting really help the leftovers stay moist even after a few days in the fridge.
Freezing
You can absolutely freeze carved turkey pieces from this Grilled Herb-Butter Turkey Recipe. I like to portion them into freezer bags with some leftover herbs or a bit of the drippings poured in for moisture. When properly sealed, turkey freezes well for up to 3 months without losing much flavor or texture.
Reheating
To reheat, I gently warm the turkey in a covered baking dish with a splash of broth or leftover herb butter added on top to prevent drying out. Cover with foil and heat at 300°F until just warmed through. This low and slow reheating method keeps the turkey juicy and tender without overcooking.
FAQs
-
Can I use a smaller or larger turkey for this grilled herb-butter turkey recipe?
Absolutely! You can adjust cooking times depending on the size of your turkey. For smaller birds, reduce cooking time accordingly, and for larger birds, increase it. Always rely on an instant-read thermometer to confirm the turkey reaches 165°F internal temperature to ensure it’s fully cooked and safe.
-
Do I need to brine the turkey before grilling?
Brining is optional but can add extra moisture and flavor. Since this recipe uses a flavorful herb-butter basting and turkey stock during grilling, you might find brining unnecessary. However, if you have time, a simple brine can enhance tenderness and juiciness even more.
-
What if I don’t have a large enough grill for the whole turkey?
If your grill can’t fit the entire turkey, consider spatchcocking it (removing the backbone and flattening it). This reduces cooking time and makes the bird more manageable on smaller grills while still allowing excellent heat circulation and char formation.
-
Can I prepare the herb butter ahead of time?
Yes! Preparing the herb butter a day ahead lets the flavors meld and makes grilling day stress-free. Just store it covered in the fridge and warm gently before basting to return it to liquid form.
-
How do I know when the turkey is done on the grill?
The best way is using an instant-read thermometer inserted into the thickest part of the breast without touching bone. A reading of 165°F means the turkey is perfectly cooked. Avoid guessing by time alone, as grills may have hot spots and cooking speeds vary.
Final Thoughts
I absolutely love how this Grilled Herb-Butter Turkey Recipe turns out every single time—it’s juicy, flavorful, and gives you that beautiful grilled finish that feels so special. When I first tried grilling a whole turkey, I was nervous, but this method soon became my favorite for holidays and backyard dinners alike. I hope you’ll enjoy making this recipe as much as I do; it’s really one of the best ways to enjoy turkey with a fresh, flavorful twist. Trust me, your family and guests will go crazy for it!